Body Camera Management Software: SPIKECAM Setup and Buying Guide
Learn how SPIKECAM body camera management software handles USB imports, ID binding, file search, users, and storage, with a practical evaluation checklist.
Editorial guidance, not legal advice or a model-specific performance promise. Check the rules and requirements that apply to your location and use.
What Does Body Camera Management Software Actually Manage?
Body camera management software helps a team connect recordings to the right device and person, collect files, find them later, and control who can use them. The useful question is whether a particular package supports your camera and your daily workflow—not simply whether it can play a video.
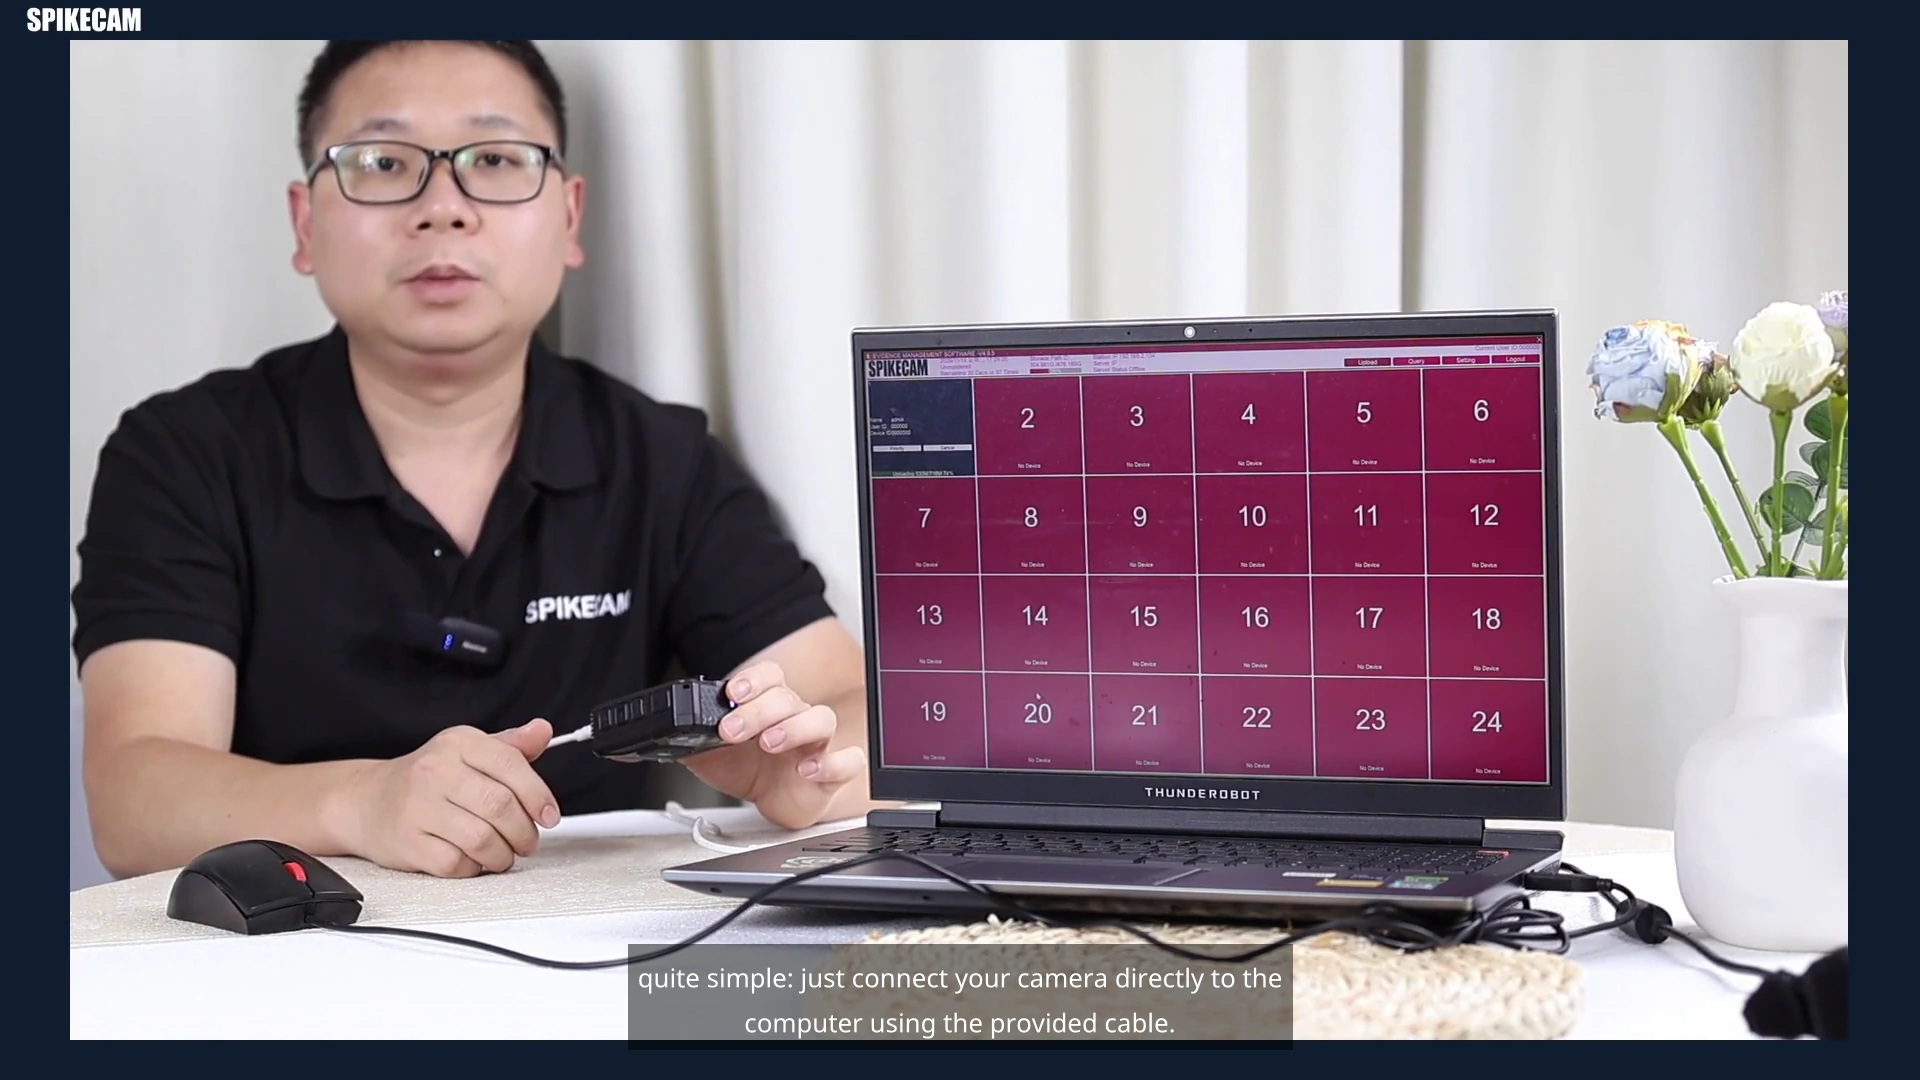
This guide follows SPIKECAM's own digital evidence management software (DEMS) setup tutorial. It shows a Windows PC workflow in Evidence Management Software V4.9.5, from USB connection and ID binding to file queries and software settings. A second SPIKECAM video illustrates a separate task: viewing an S7P's local RTSP stream in VLC.
Use the steps below to prepare a small evaluation, then record what your configuration actually does. The screenshots document the tutorial; the acceptance checklist is a proposed test you can run. Neither a menu nor a demonstration establishes every camera's compatibility, security behavior, or performance at fleet scale.
Watch the original SPIKECAM video · Internet connection required.
00:16 Install · 01:36 Bind and import · 03:00 Search · 05:03 Users · 05:37 Storage · 06:29 Logs
Device setup, recorded files, and live viewing are different jobs
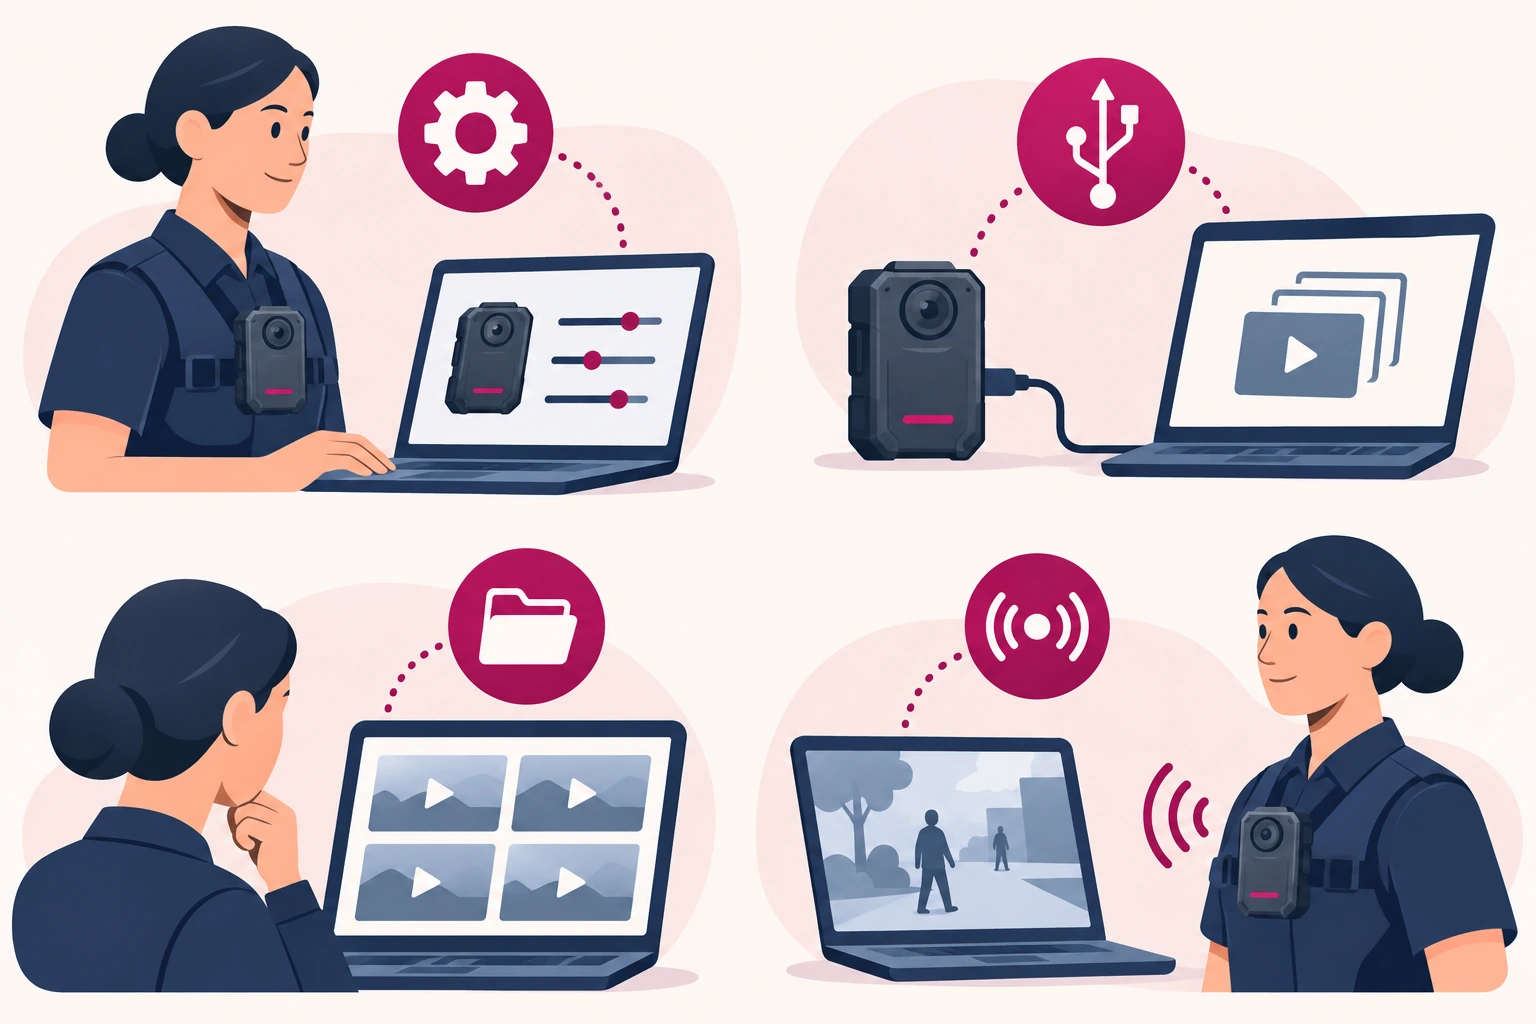
Body camera software can handle several different jobs. Start by identifying the job that is missing from your current process.
| Job | What the operator needs | SPIKECAM starting point |
|---|---|---|
| Configure a camera | Set supported parameters, clock, and IDs | A matching Cam Manager build |
| Collect recordings | Identify the device and import its files | A matching DEMS collection package |
| Review stored files | Search, organize, and control access | The appropriate standalone, server/client, or web edition |
| View live activity | Receive a supported stream; evaluate other live functions separately | A player or a compatible live platform |
The Cam Manager product description concerns camera configuration. The tutorial's DEMS interface concerns collection and stored files. Keeping those responsibilities separate makes support requests and purchasing decisions much clearer.
When a shared folder or media player stops being enough
A folder and player can be enough for a simple, authorized review. The difficulty grows when several people return cameras, filenames look similar, and someone needs the correct recording days later.
Ask who assigns cameras, checks import completion, retrieves a file, approves export, and handles deletion. If those responsibilities depend on one person's memory, software evaluation should focus on identity, retrieval, access, and recovery. Buying additional features will not fix an undefined handover process.
Keep the original recording separate from working copies used for review. Being able to open a copied MP4 establishes file playback; it does not establish camera configuration, reliable user assignment, or integration with an evidence system.
Prepare the Right SPIKECAM Software, PC, and License
Confirm the camera model, firmware, and software build
Before installing body camera management software, create a short configuration record: camera model, hardware version if available, firmware, software package name and version, Windows edition, and intended connection method. Send that record to SPIKECAM when requesting the installer.
The video shows V4.9.5 on a Windows PC. It does not establish support for every Windows release or every SPIKECAM model. An older product sheet's operating-system list is not a substitute for confirmation of the package you will install.
Also confirm the license scope: which computer or installation it covers, how activation works, and what happens when the PC is replaced. A trial counter visible in a recording is not a current price or trial offer.
Install the supplied package and identify the storage location
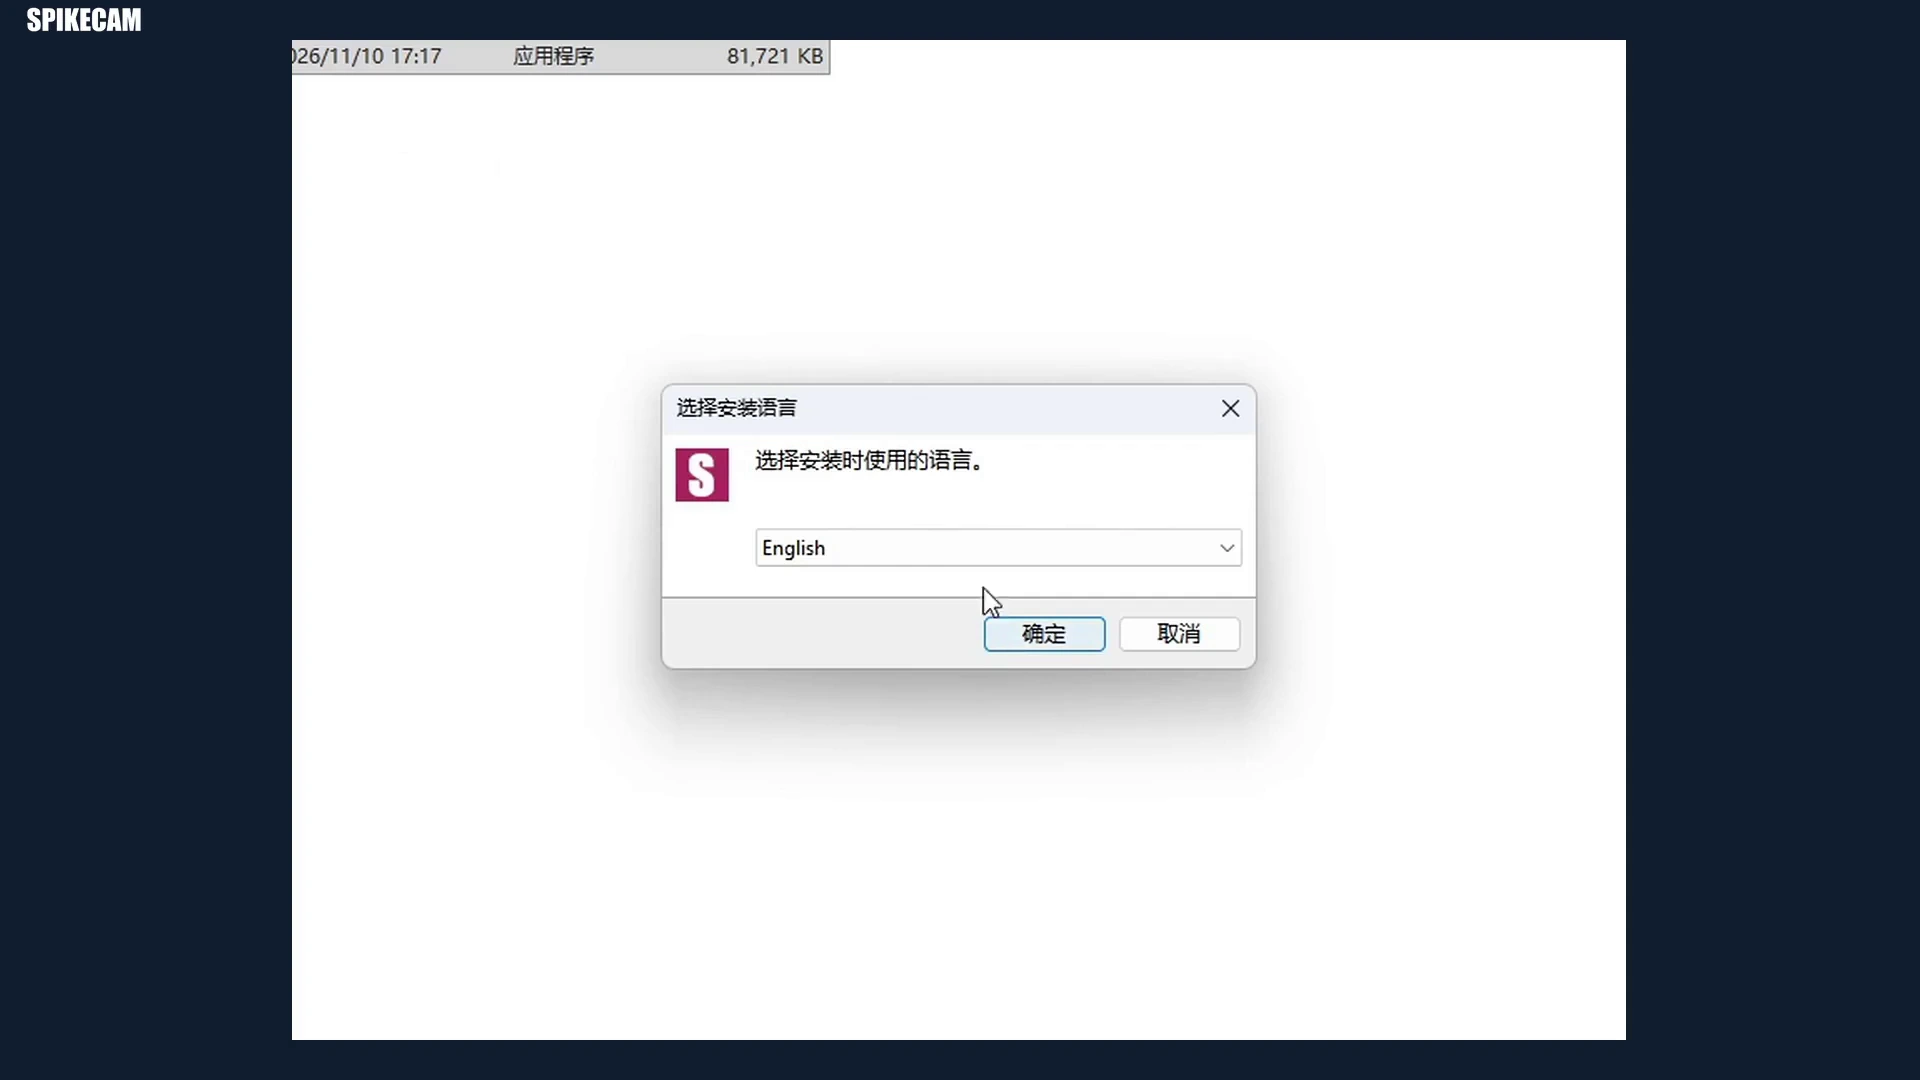
At 00:16 in the tutorial, the installer workflow begins. Use the package supplied through your established SPIKECAM contact or support channel. Check its identity before approving operating-system prompts; follow your organization's installation process.
After opening the software, identify the selected storage path and available space before connecting a camera. Confirm who will administer the PC and where recordings should reside. A successful launch is only the first checkpoint.
The later registration sequence shows where licensing information is entered. Share machine codes only through the agreed support route, and keep license values out of public screenshots. The video shows the registration controls, not proof that every viewer's installation is activated.
Connect the Camera, Bind IDs, and Import Recordings
Match the device ID to the intended user before collection
Begin with a short, nonsensitive test recording. Note its approximate duration and recording time, then connect the camera using the supported data connection. A charging-only cable may power a device without providing the data connection you need.
At 01:36, the tutorial reaches the binding and import workflow. The binding dialog shows a name, User ID, and Device ID. Check all three against your issue record before confirming. The all-zero values in the demonstration are sample identifiers, not a naming scheme to copy into a working fleet.
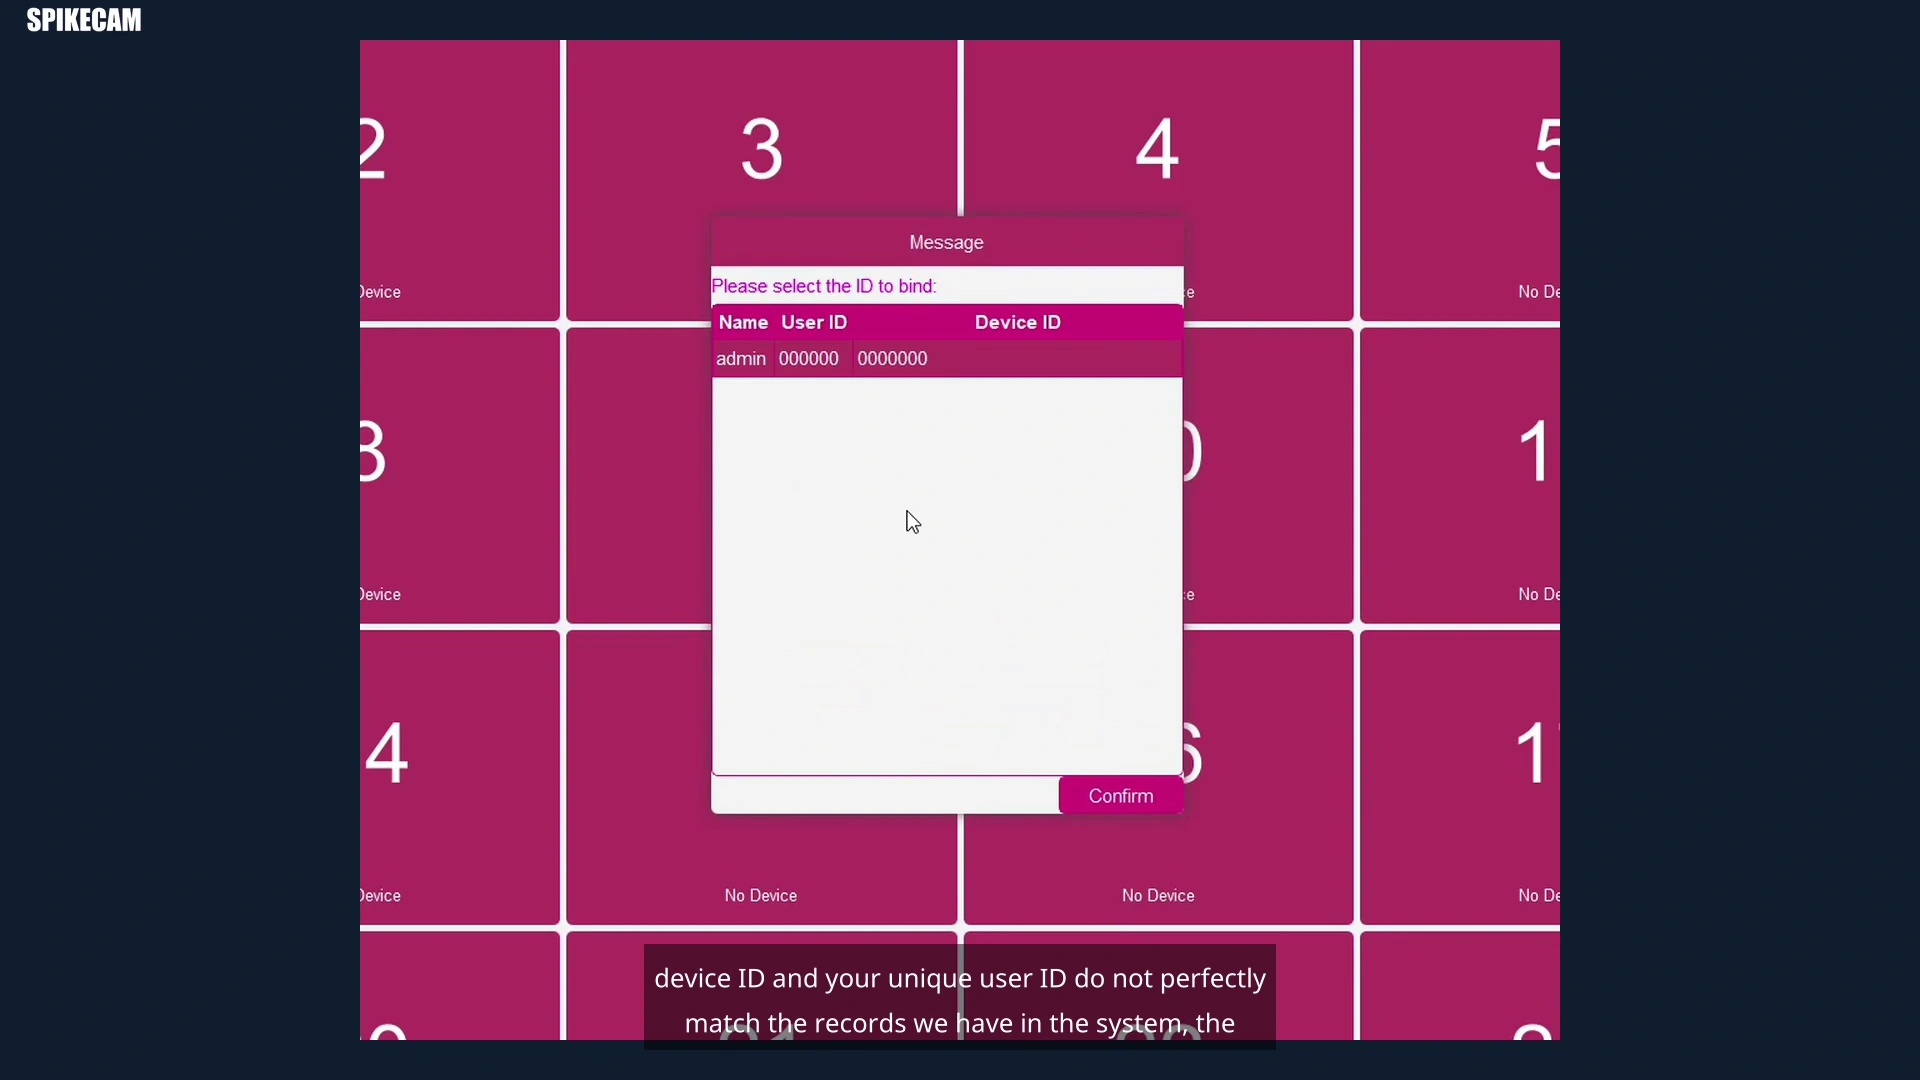
For shared cameras, plan a separate reassignment test. Record a clip under one assignment, change the assignment using the approved procedure, and record another. Check whether the earlier recording retains the correct association. The tutorial does not establish how every edition preserves assignment history.
Watch transfer progress and verify the imported sample
The upload screen shows progress for the connected camera, with Priority and Cancel controls. Although the interface has 24 tiles, the captured demonstration has one active upload. Treat simultaneous collection capacity as something to test with your intended cameras, connections, PC, and storage.
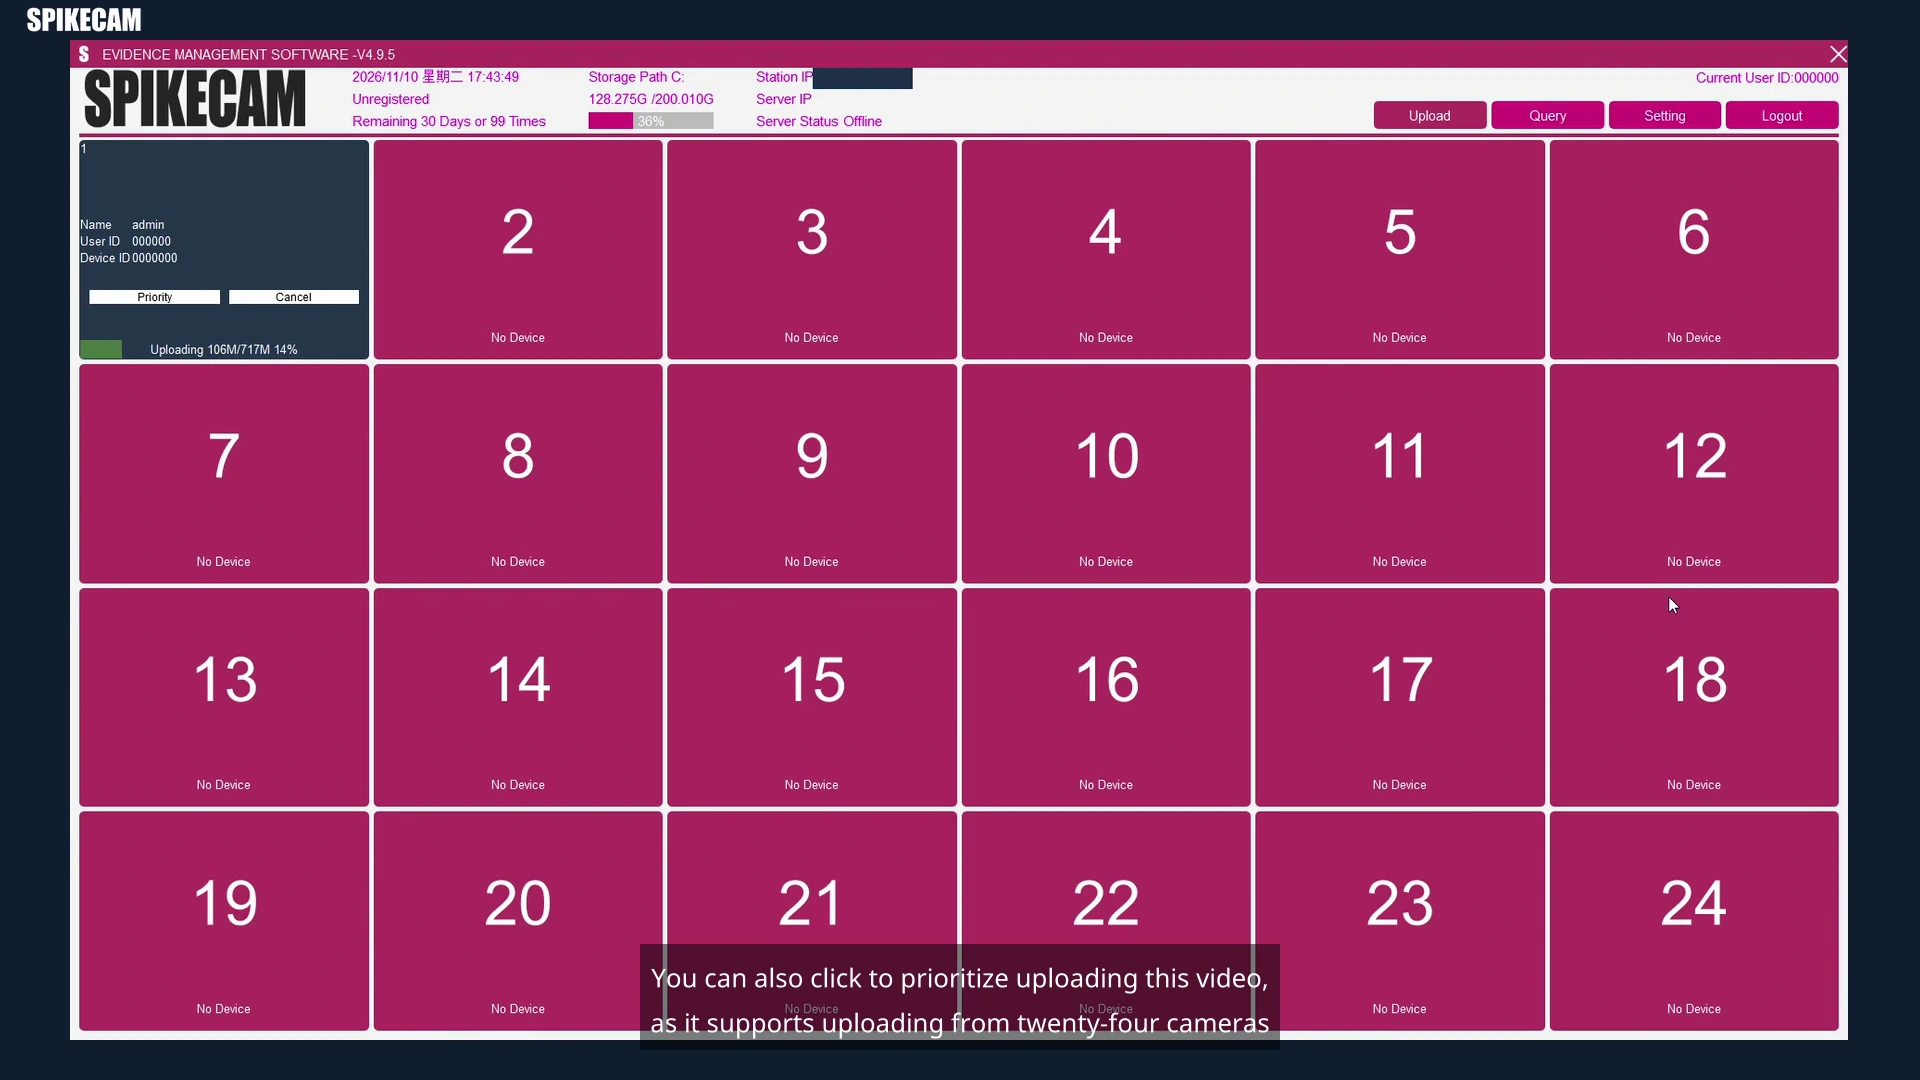
For the initial import, use this sequence:
- Confirm the recognized device and user before transfer.
- Observe progress and wait for completion; do not assume a connected tile means files are safe.
- Find the known test recording in the query screen.
- Check its identity, duration, and expected beginning and end; listen for the intended audio.
- Retain the camera copy until the collection and recovery checks are satisfactory.
If transfer fails, start with the cable, power, device recognition, matching software version, and free storage space. Record the actual message and failed step before changing settings. Avoid erasing the camera to solve an unexplained import problem.
For a multi-camera return station, use the body camera docking station guide to separate physical slots, data transfer, charging, and software compatibility. More charging positions do not establish a faster or compatible import workflow.
Find Recordings with Filters and Searchable Remarks
Separate recording time, upload time, and file type
The query demonstration begins around 03:00. Visible filters include name, user ID, department, date, time basis, file type, and tag. Use a known sample first so that an empty result is easy to investigate.
Recording time and upload time answer different questions. A clip made on Monday and collected on Tuesday may be excluded if you search Tuesday using recording time. Verify the selected time basis and date range before concluding that a recording is missing.
Next, check the user and file-type filters. A photo, log, or audio entry will not necessarily appear in a video-only search. During evaluation, compare the timestamp shown by the camera, the PC, and the imported record. Document the time-zone convention your team will use; do not assume the software normalizes it automatically.
Add an incident reference as a remark and retrieve it
The 03:41 sequence demonstrates a Comment field and keyword search. The phrase “car accident” is an entered remark in this tutorial. It is not evidence that the software recognizes accidents, searches spoken dialogue, or analyzes the video scene.
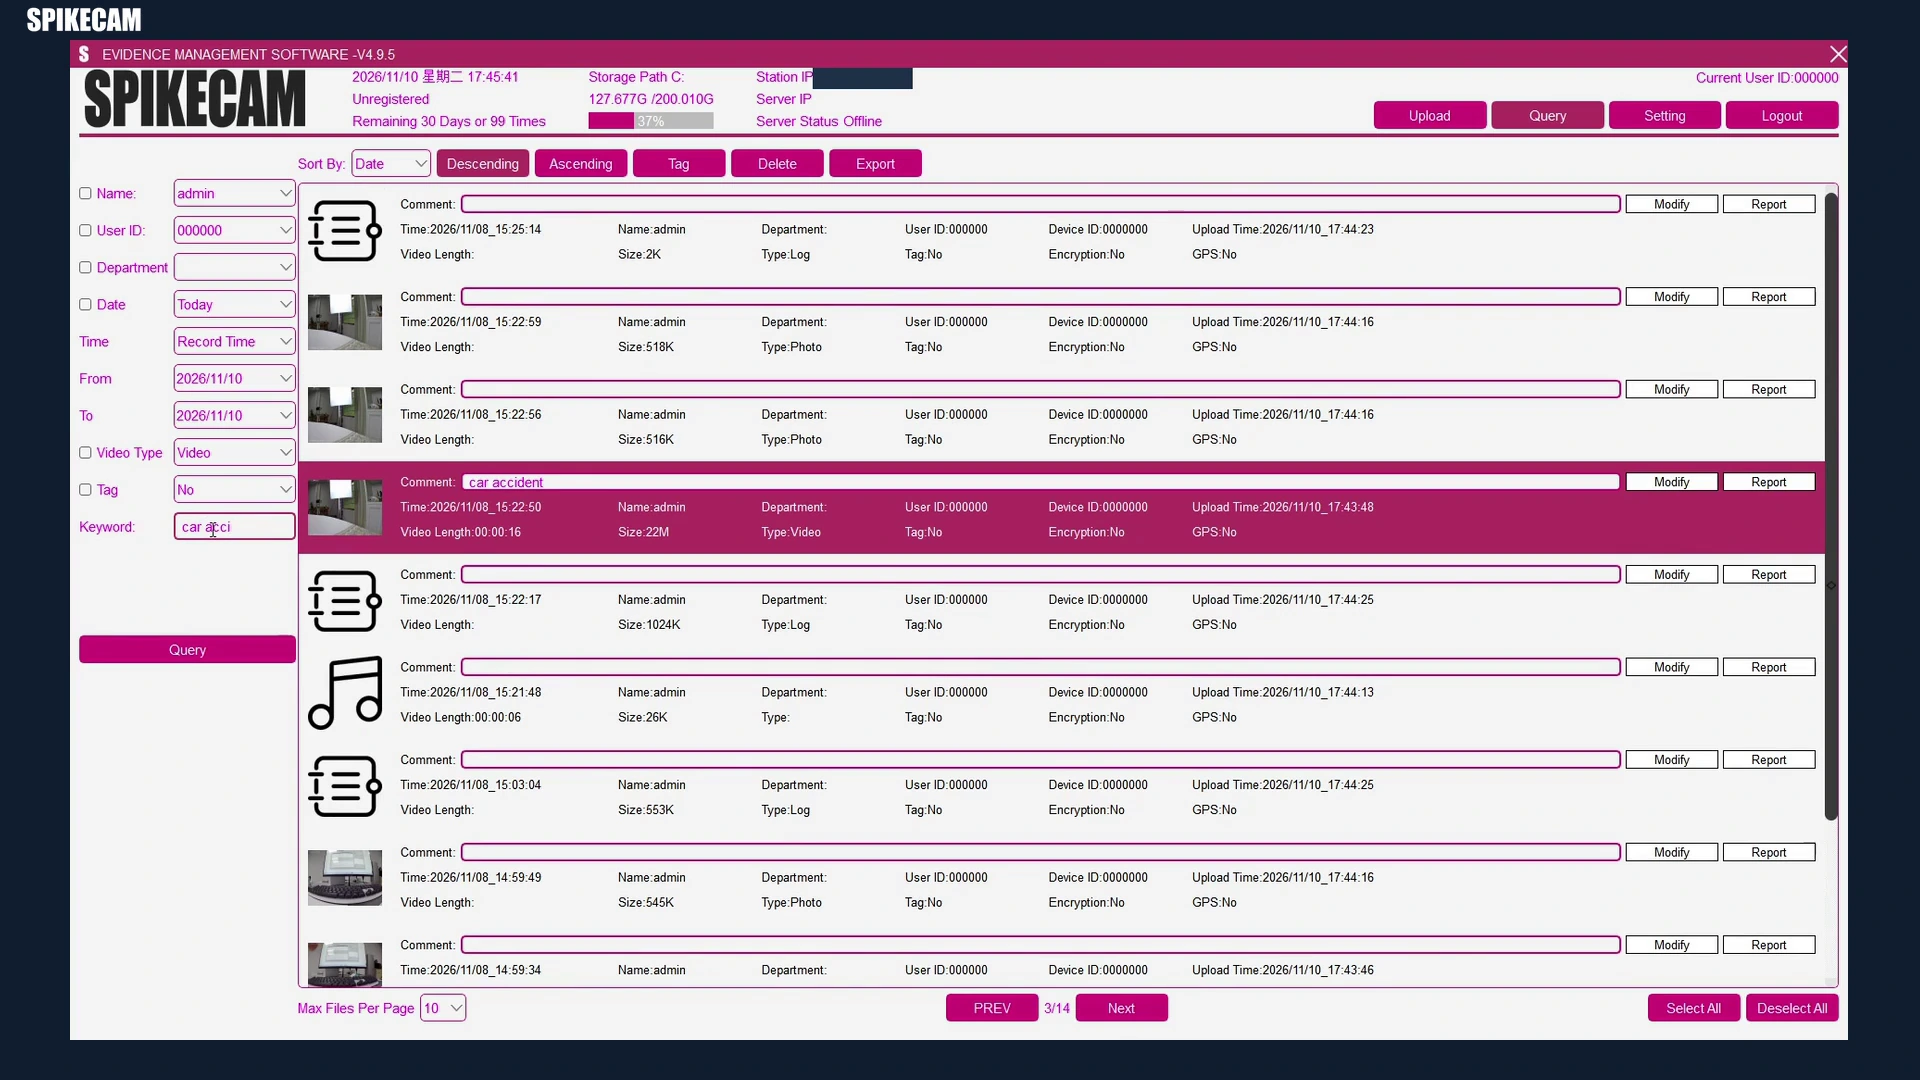
For a fictional training exercise, enter TRAINING-001 as the agreed reference on a test file, save it using the displayed control, and search for that reference. Then remove the keyword and repeat with the correct user and date filters. Record the exact inputs that retrieve the same file.
Standardize short references before deployment: inconsistent punctuation, duplicate references, or vague descriptions make retrieval harder. Keep unnecessary personal details out of comments. If you need transcription, OCR, automatic classification, or a case-management connection, ask for a separate demonstration of those functions.
Configure Users and Check What the Operation Log Records
Assign permissions deliberately instead of copying the demo admin
At 05:03, the tutorial opens user management. The screen includes role choices and controls for adding users or devices, tagging, deleting data, reports, export, software settings, and access scope.
Start with responsibilities, then test whether the selected edition can enforce them. This sample matrix is a proposed policy, not a statement that the demo already implements it:
| Responsibility | View | Export | Delete | Change settings |
|---|---|---|---|---|
| Recording reviewer | Assigned scope | Only if approved | No | No |
| Authorized exporter | Assigned scope | Yes | No | No |
| System administrator | As required | As required | Controlled approval | Yes |
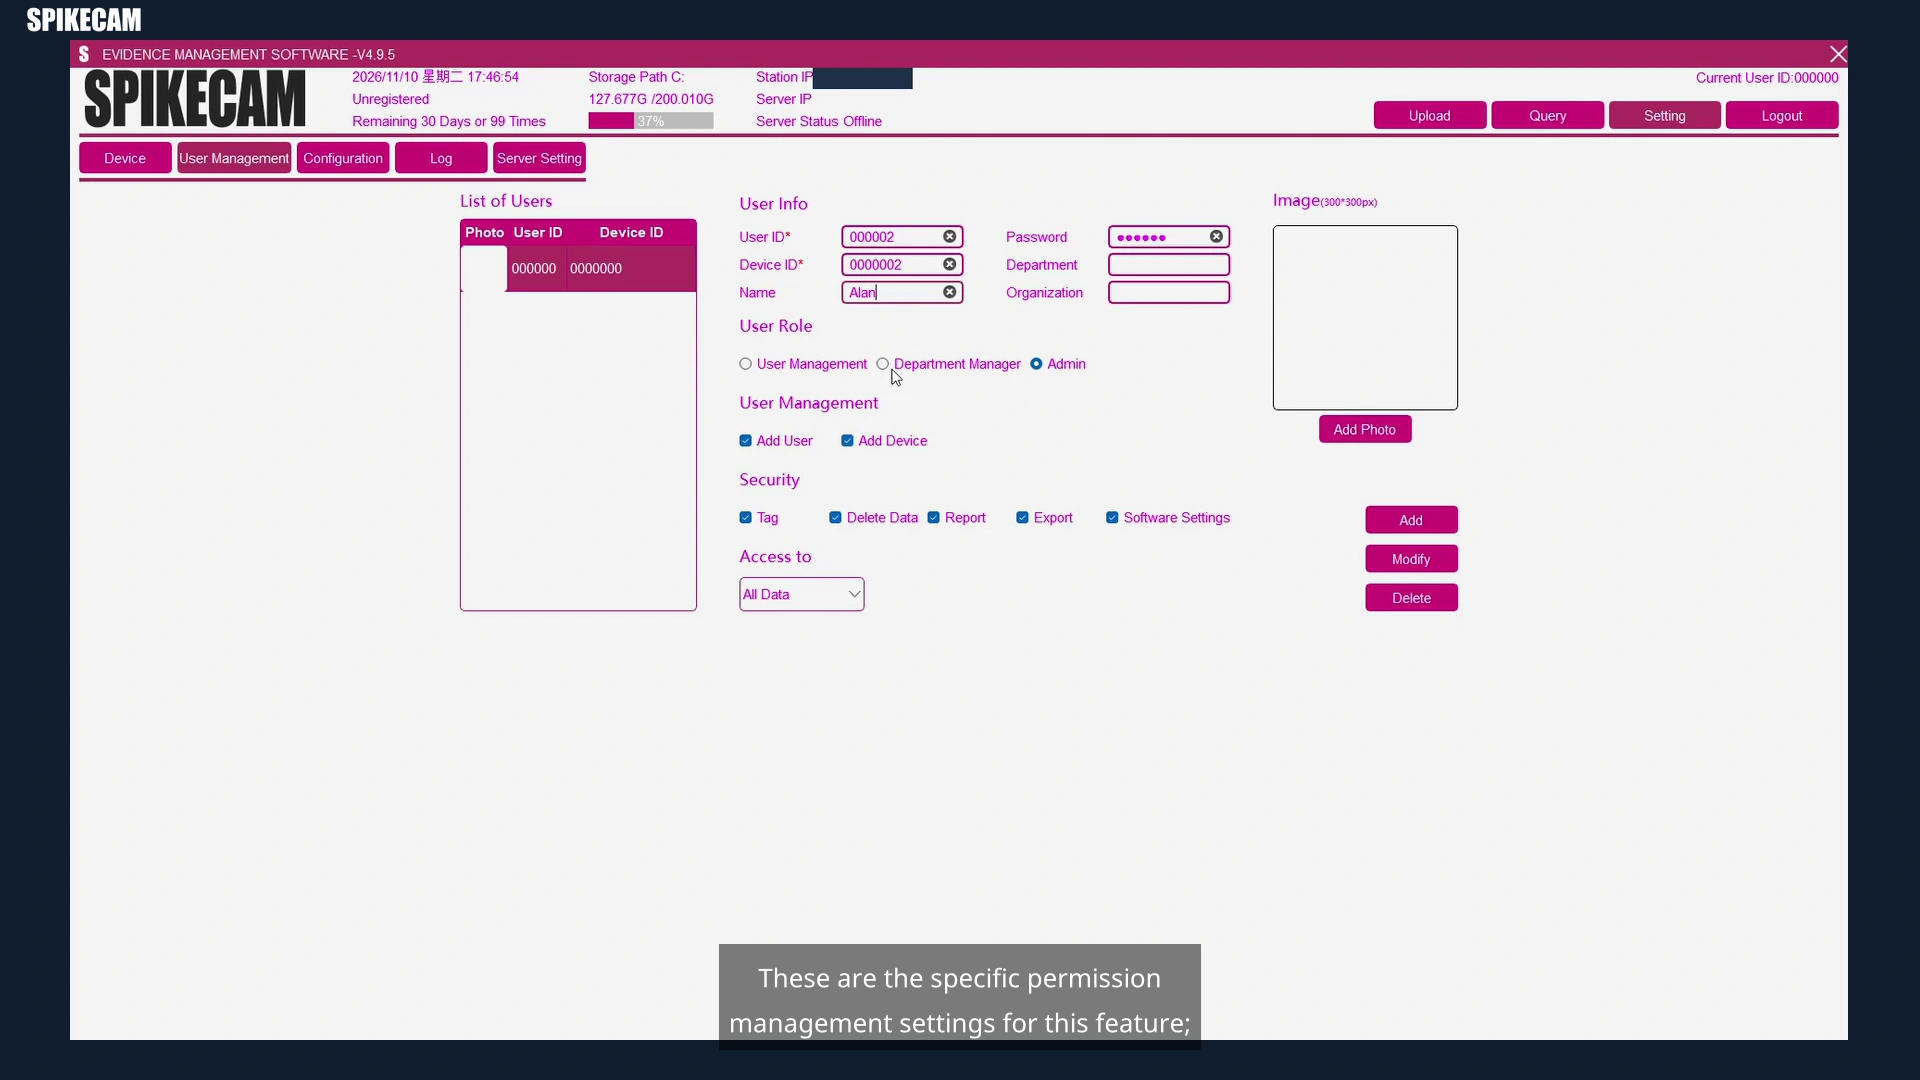
Do not copy the demonstration's administrator permissions to everyone. Give each evaluator a separate test account so that an observed action can be associated with the person who performed it.
Test allowed and denied actions with separate accounts
A checked permission box shows configuration, not successful enforcement. Sign in as a restricted test user and attempt both an allowed action and a prohibited action on a synthetic file. Repeat after logging out and back in, recording the expected and observed results.
The operation-log sequence around 06:29 shows entries for selected actions such as login, upload, comments, and user creation. Check which actions your edition records, the identity and timestamp fields, who can access logs, and how long they remain available.
Visible log entries do not prove that every action is captured or that logs are immutable. If you require tamper detection, legal holds, detailed export history, or a specific chain-of-custody process, make those explicit acceptance requirements and request supporting documentation.
Plan Storage, Retention, and Camera Cleanup Separately
Choose a storage path and keep a recovery copy
In this tutorial, “upload” describes collection from a connected camera into the PC workflow. It does not demonstrate cloud storage. The configuration screen at 05:37 includes storage paths and a low-space alert setting.
Estimate storage from representative recordings made with your intended settings:
Average file size × files collected per day × retention days = an initial media-storage estimate.
Use consistent units and include all cameras in the daily count. Add room for other file types, software data, working headroom, growth, and the separate recovery copy. Measure actual files; a camera's resolution alone does not determine storage needs.
A storage path is a destination, not a backup. Ask which media, database, configuration, and license components are required to restore a usable system. Test recovery on an approved test environment before relying on a backup procedure.
Validate retention and deletion behavior before changing it
The demonstrated “Delete Files in Camera After Upload Finished” option is unchecked. The screen also contains lifecycle fields set to zero. Do not infer from the number alone that retention is unlimited, deletion is immediate, or a feature is disabled.
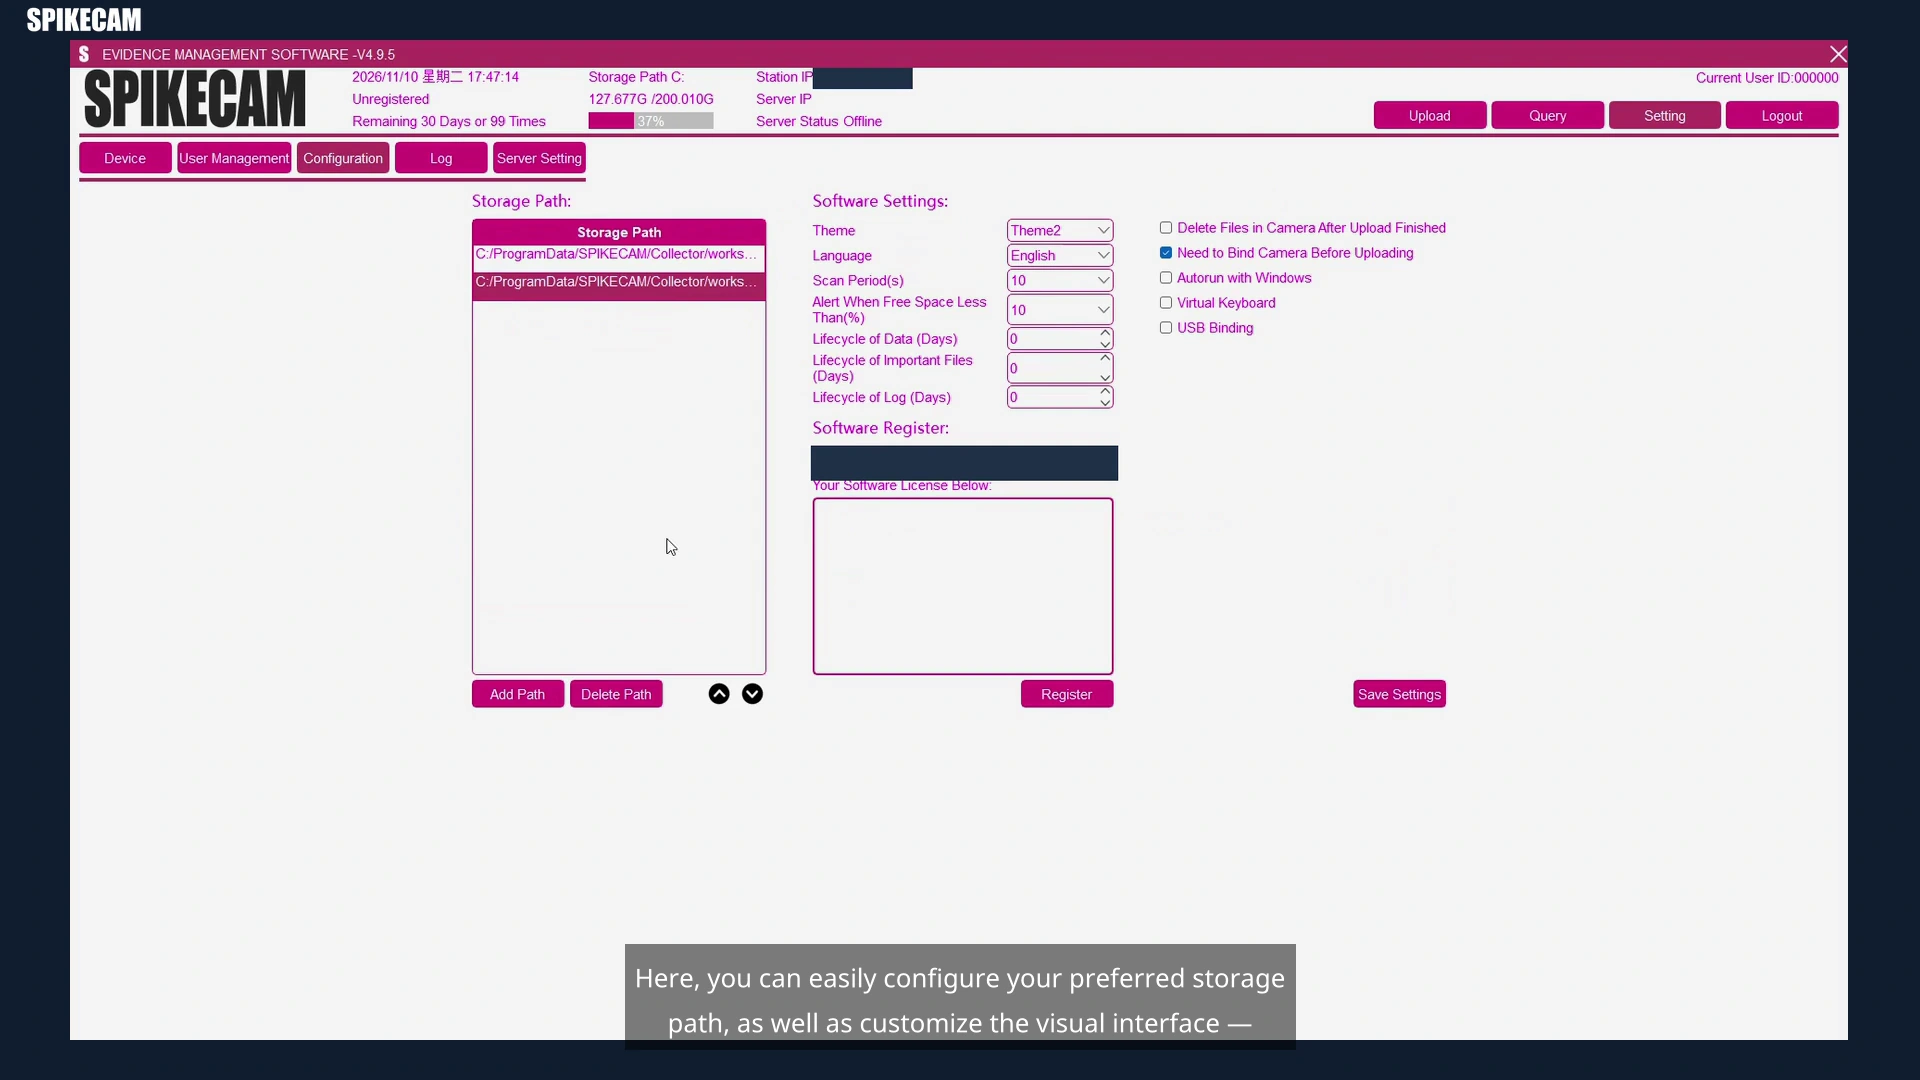
Request the meaning of those settings for your exact build. Then test deletion behavior using disposable recordings, including what happens after an interrupted transfer and whether an important-file designation changes retention.
Your organization should define retention, exceptions, deletion approval, and recovery responsibilities under its applicable requirements. This tutorial supplies no universal legal retention period. Keep automatic camera cleanup off during the initial evaluation until import verification and recovery are understood; decide its eventual use through the approved operating procedure.
Does Body Camera Management Software Include Live Streaming?
What the S7P RTSP-to-VLC demonstration proves
SPIKECAM's second video shows a different workflow: configure an S7P through Cam Manager, connect it to a local network, obtain its RTSP address, and open the stream in VLC. It demonstrates local live playback for that setup.
Watch the original SPIKECAM video · Internet connection required.
00:43 Cam Manager · 02:16 Camera address · 02:50 VLC · 03:10 Live view
That is useful when your immediate question is whether a technician can view a camera's live output. Follow the separate body camera RTSP setup guide for the device-address and player steps.
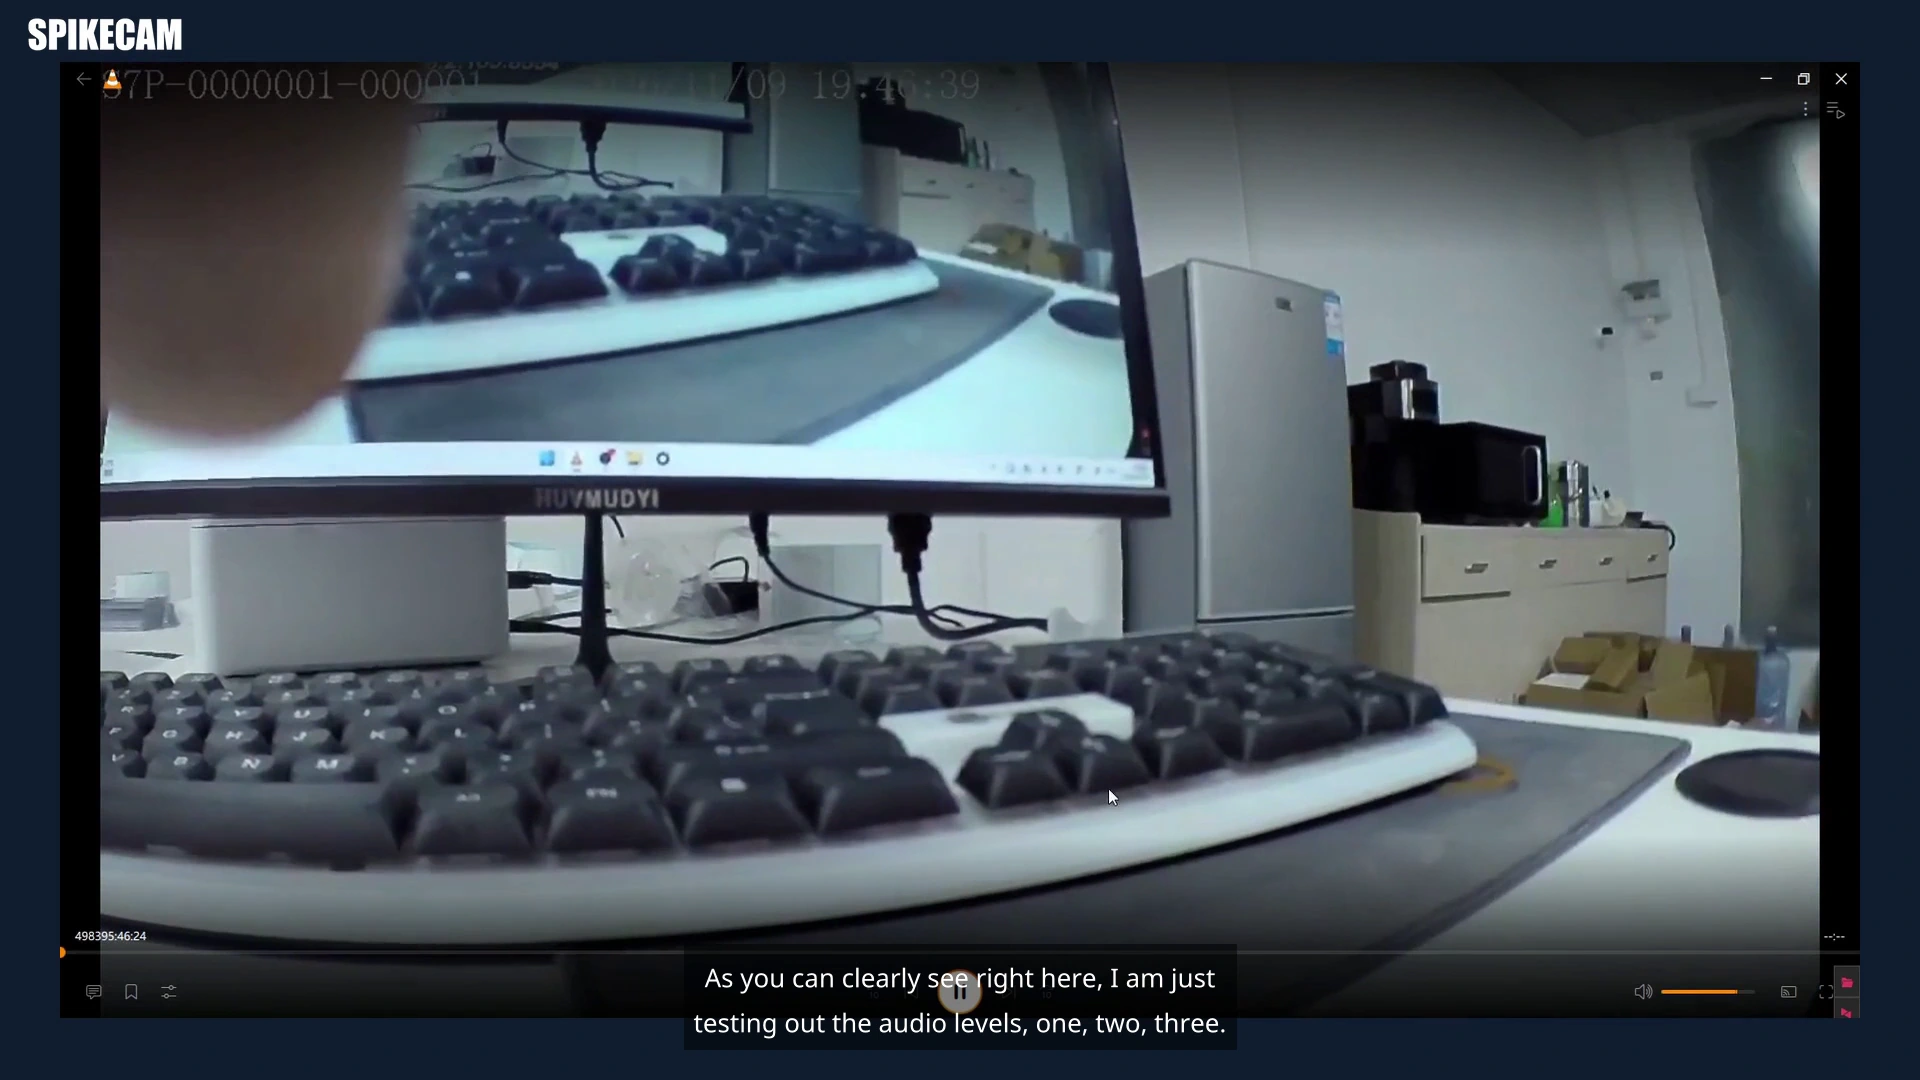
Opening an RTSP stream does not establish GPS tracking, intercom, remote recording control, cloud access, or automatic ingestion into DEMS. Keep the local viewing result separate from your recorded-file acceptance results.
When live operations need a separate platform
If supervisors need live viewing alongside location or communication functions, describe those requirements before choosing software. SPIKECAM's CMSV catalog lists live video, GPS tracking, intercom, and video management for supported deployments. These functions depend on the matching camera capabilities, firmware, software build, license, and network configuration; they are not demonstrated by these two videos.
Map two paths: live camera to viewer, and recorded file to managed storage. For each, identify the operator, connection, storage responsibility, and failure response. A live service may reconnect after a network interruption while still leaving a gap in server recordings; test the behavior you need rather than assuming continuity.
For platform planning, see the streaming protocols and open-source platforms guide. A media server is one component, not automatically a complete evidence workflow.
Choose a Deployment That Matches Your Team
Standalone PC, server/client, and browser-based workflows
Choose body camera management software around your collection points and the people reviewing recordings. For a single location, a matching standalone DEMS package is a practical first evaluation because the video shows collection and review directly. As responsibilities spread across locations, compare the deployment options separately.
| Need | Candidate to evaluate | Confirm before choosing |
|---|---|---|
| Local collection and retrieval | Matching standalone package; discuss DEMS Collection | Camera/build pairing, PC, license, backup |
| Several collection clients and central storage | DEMS Server/Client | Client versions, server, permissions, capacity, network |
| Browser-based evidence review | DEMS Web with its documented DS02A workflow | Camera/dock compatibility, hosting, browser, access |
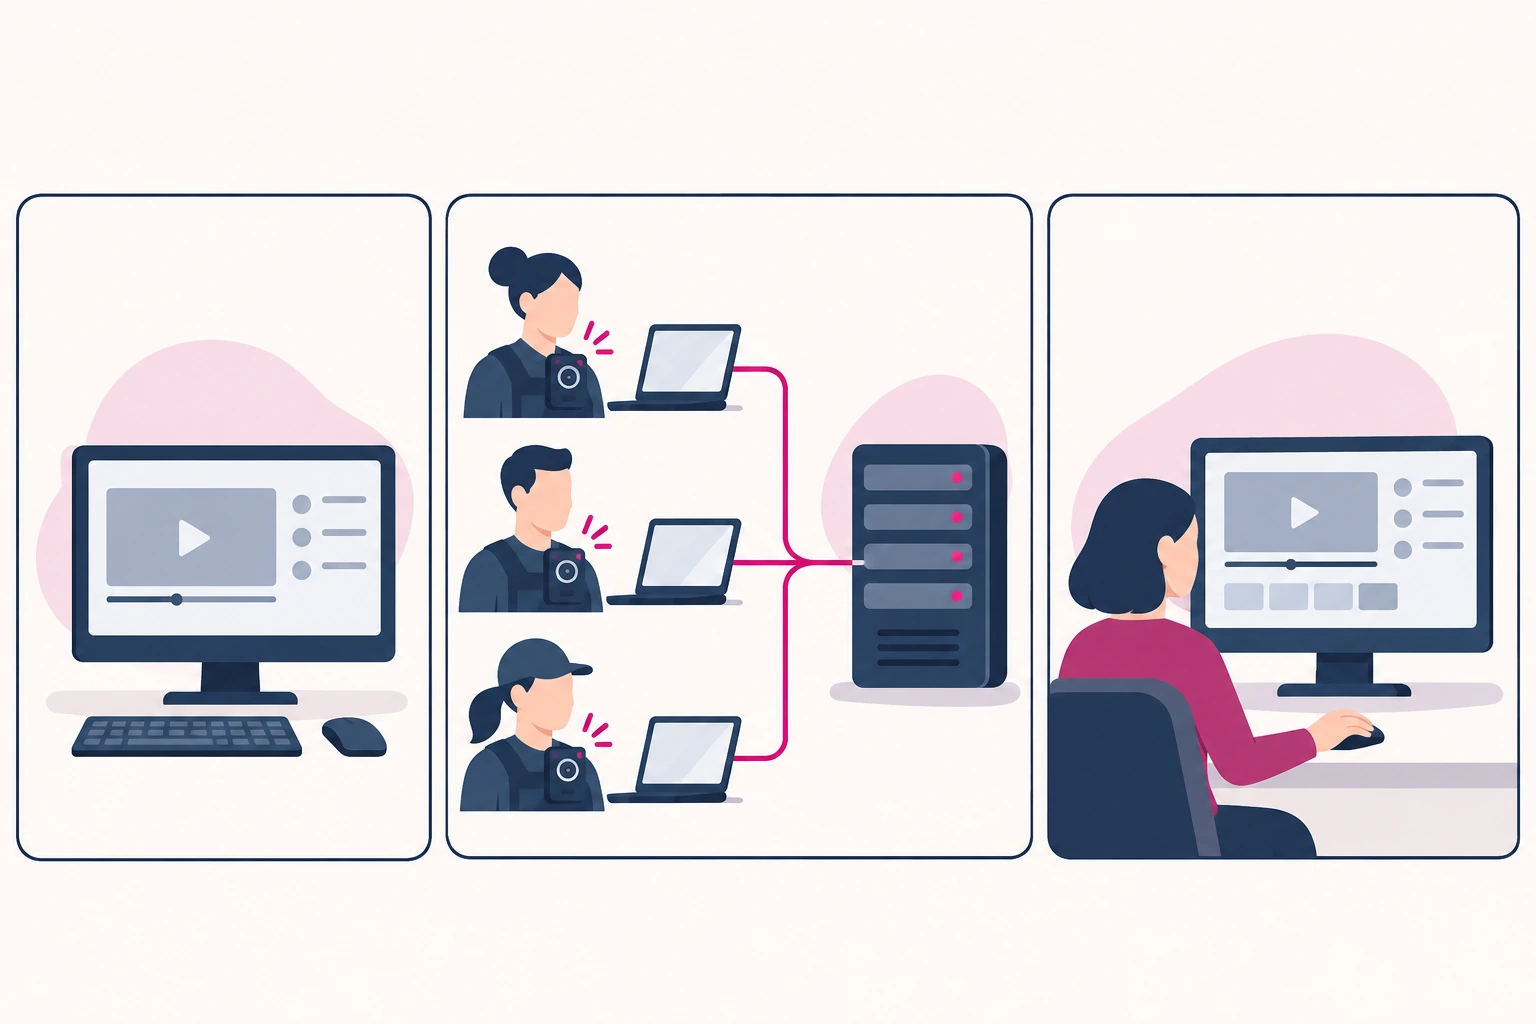
The current catalog describes these roles, but it does not establish that the V4.9.5 demonstration is identical to every commercial edition. Start with the DEMS Collection product page and obtain the exact configuration in writing. Browser access does not itself specify where data is hosted.
Compare software by responsibilities and verified compatibility
Other vendors illustrate why product names alone are insufficient:
| Official product | Vendor-described emphasis | Evaluation lesson |
|---|---|---|
| AXIS Body Worn Manager Pro | Central administration of distributed body-worn systems | Separate device administration from file review |
| Reveal DEMS 360 | Camera, video, and live-operation components | Confirm the modules and hosting in the proposal |
| Motorola VideoManager EL | Device and footage workflows for its named ecosystem | Check the supported models, not just the file format |
These are references for comparing responsibilities, not a market ranking or a claim that they manage SPIKECAM cameras. Ask every supplier who owns the database, handles updates, restores failures, and provides usable exports when the system is retired. A feature list becomes useful when each requirement has an accountable owner and a reproducible test.
Run a One-Camera Acceptance Test Before Scaling Up
Use a short test recording and a written pass/fail record
Fictional training exercise: an evaluator creates a short clip of an empty desk, identifies it as TRAINING-001, imports it, retrieves it, and tests access with a second account. This is a suggested exercise, not a customer story or a completed SPIKECAM deployment test.

Use the accompanying acceptance worksheet or editable CSV. It starts with no completed results. Record the camera, firmware, software build, PC, date, operator, and evidence reference for each check.
| Check | Evidence to retain |
|---|---|
| Identity and import | Assignment record, progress outcome, recognizable test clip |
| Retrieval | Exact user/date/time-basis/remark inputs and the returned file |
| Interrupted transfer and reconnection | Error or status, recovered files, incomplete-file behavior |
| Duplicate import and reassignment | Duplicate handling and attribution of old versus new clips |
| Permissions | Separate-account allowed and denied attempts |
| Export and logs | Export contents, external playback, corresponding log entries |
| Recovery and cleanup | Restored sample and documented deletion behavior |
Perform interruption and deletion checks only with disposable material. A thumbnail or a completed progress bar is not enough: verify the file you intend to rely on. If a check fails, preserve the test evidence and resolve it before adding cameras.
Resolve compatibility, licensing, and export questions before purchase
Request answers tied to the proposed configuration: Which cameras and firmware are supported? Which Windows or server version is required? What is licensed? Can an exported file be played independently, and which timestamps, IDs, and remarks accompany it? What happens to access and stored data if a license expires or a PC is replaced?
Then agree on the next scale test—your intended number of devices, realistic file volumes, and simultaneous users. One successful camera import does not establish fleet capacity.
Contact SPIKECAM with your model and firmware, Windows version, camera count, collection locations, and whether you need recorded-file management, live viewing, or both. Request a matching software package, license scope, and demonstration configuration. Keep passwords and machine codes out of public messages.
Choose body camera management software around the work your team must repeat reliably: identify, collect, find, control, and recover. Use the videos to locate the relevant controls, then use your own acceptance record to decide whether the proposed configuration is ready for deployment.
Related articles
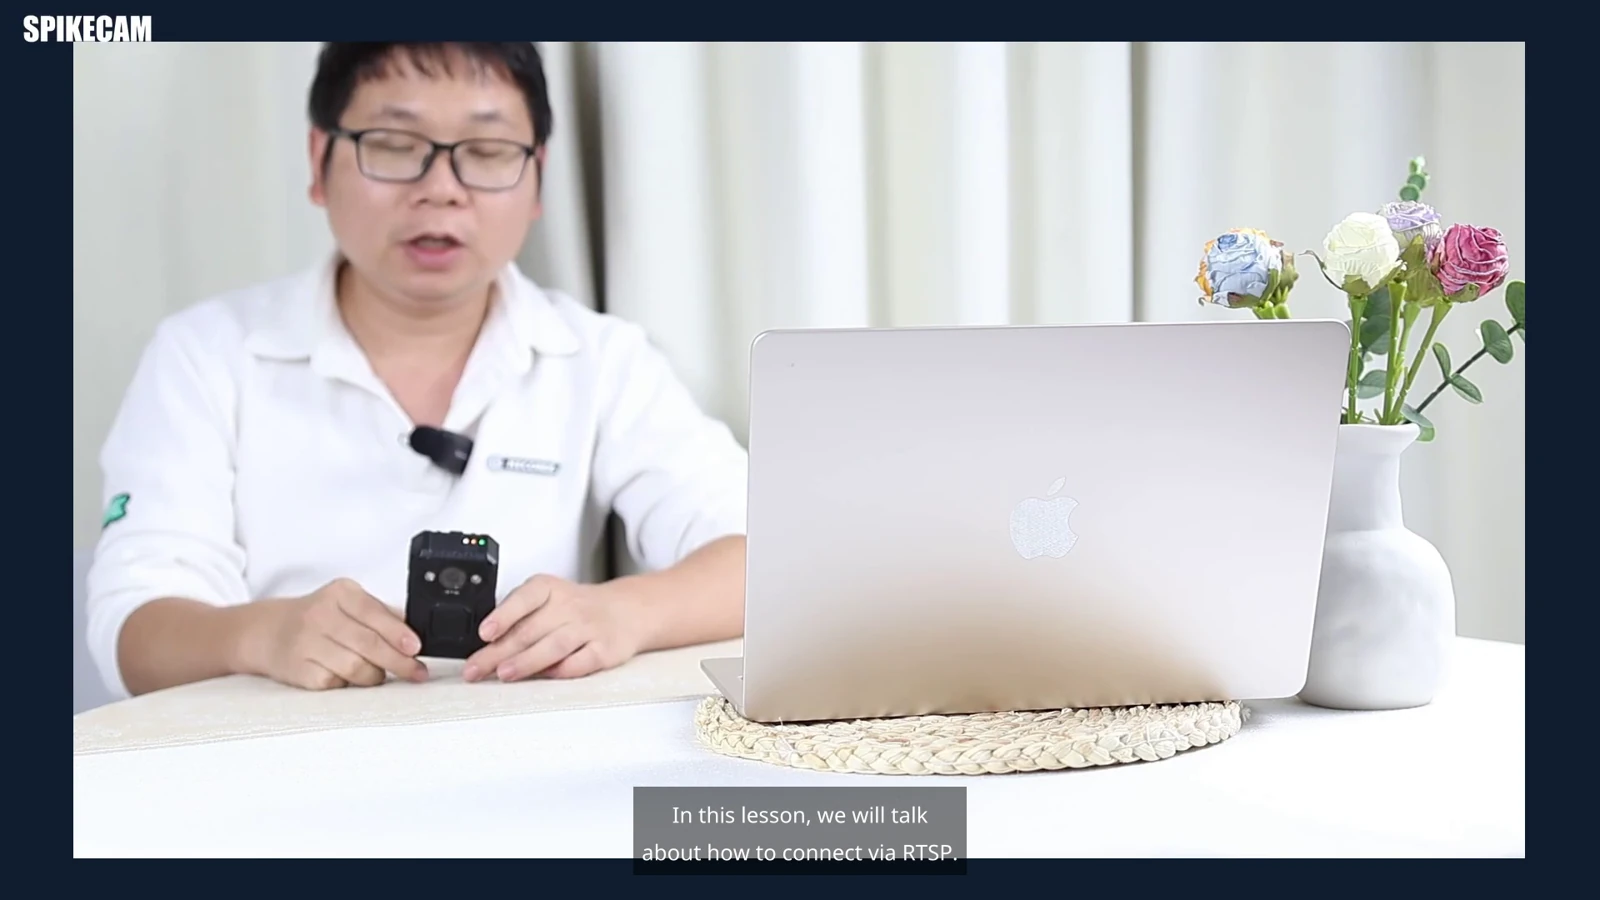
Body Camera RTSP Setup: Stream a SPIKECAM S7P to VLC
Set up body camera RTSP streaming with SPIKECAM’s S7P video tutorial. Connect over Wi-Fi, find the camera URL, test VLC playback, and troubleshoot.
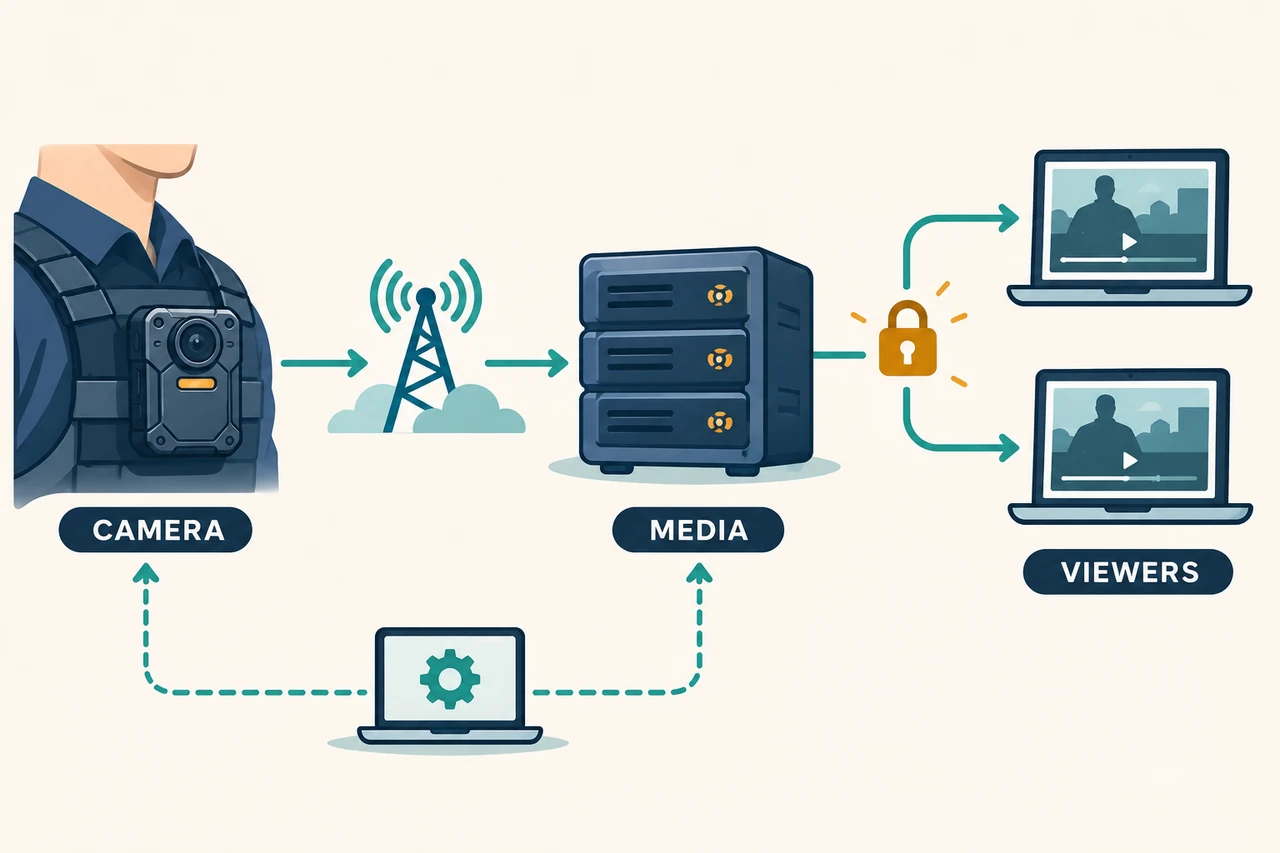
Body Camera Streaming Protocols: RTMP, RTSP, CMSV, and 10 Open-Source Platform Options
Understand body camera streaming protocols, compare 10 self-hosted platform routes, and use practical AI coding prompts to plan a private live video pilot.

Body Camera Docking Stations: A Practical Buying Checklist for Teams
Choose a body camera docking station by checking camera compatibility, return peaks, charging and upload dependencies, and a practical team acceptance test.