Body Camera RTSP Setup: Stream a SPIKECAM S7P to VLC
Set up body camera RTSP streaming with SPIKECAM’s S7P video tutorial. Connect over Wi-Fi, find the camera URL, test VLC playback, and troubleshoot.
Editorial guidance, not legal advice or a model-specific performance promise. Check the rules and requirements that apply to your location and use.
Understand What RTSP Does in a Body Camera Workflow
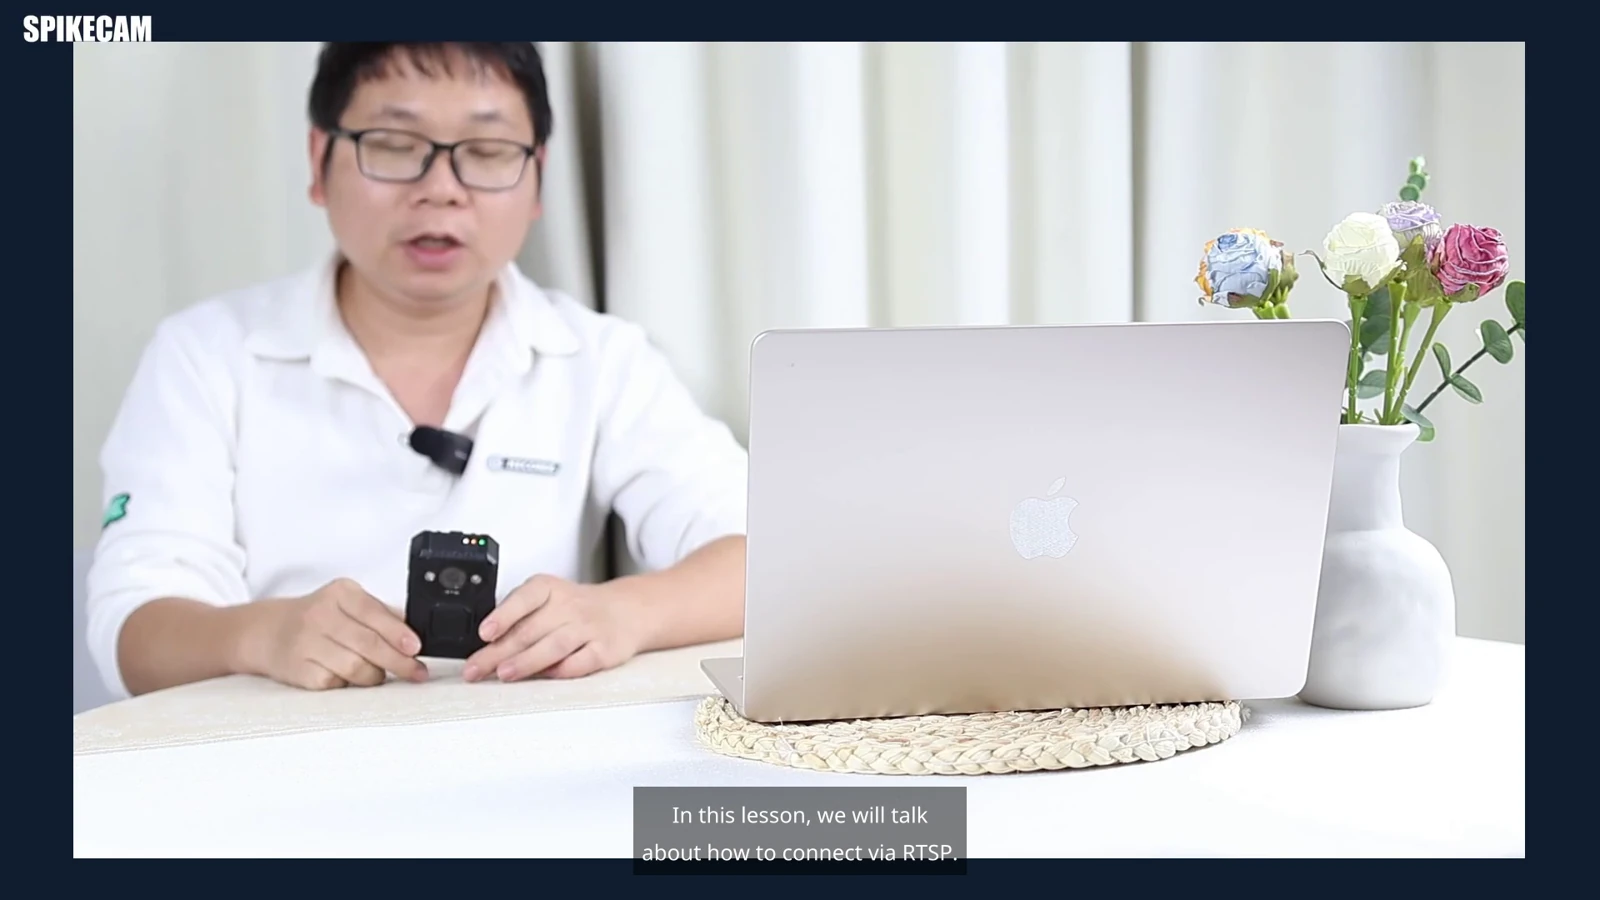
A body camera RTSP connection can give a technician a useful first checkpoint: can this camera deliver live video to this computer? In SPIKECAM’s S7P tutorial, Peter configures the camera in Cam Manager, connects it to Wi-Fi, finds its RTSP address, and opens that address in VLC.
This guide follows the actual demonstration, then adds a troubleshooting sequence and a pilot checklist. The demonstration uses a local network. Remote access, recorder compatibility, and browser viewing each need additional checks.
Watch the original SPIKECAM tutorial on YouTube. The video requires an internet connection. Chapters: 00:37 Settings · 01:28 Camera address · 02:39 RTSP URL · 03:02 Playback.
Separate RTSP session control from RTP media
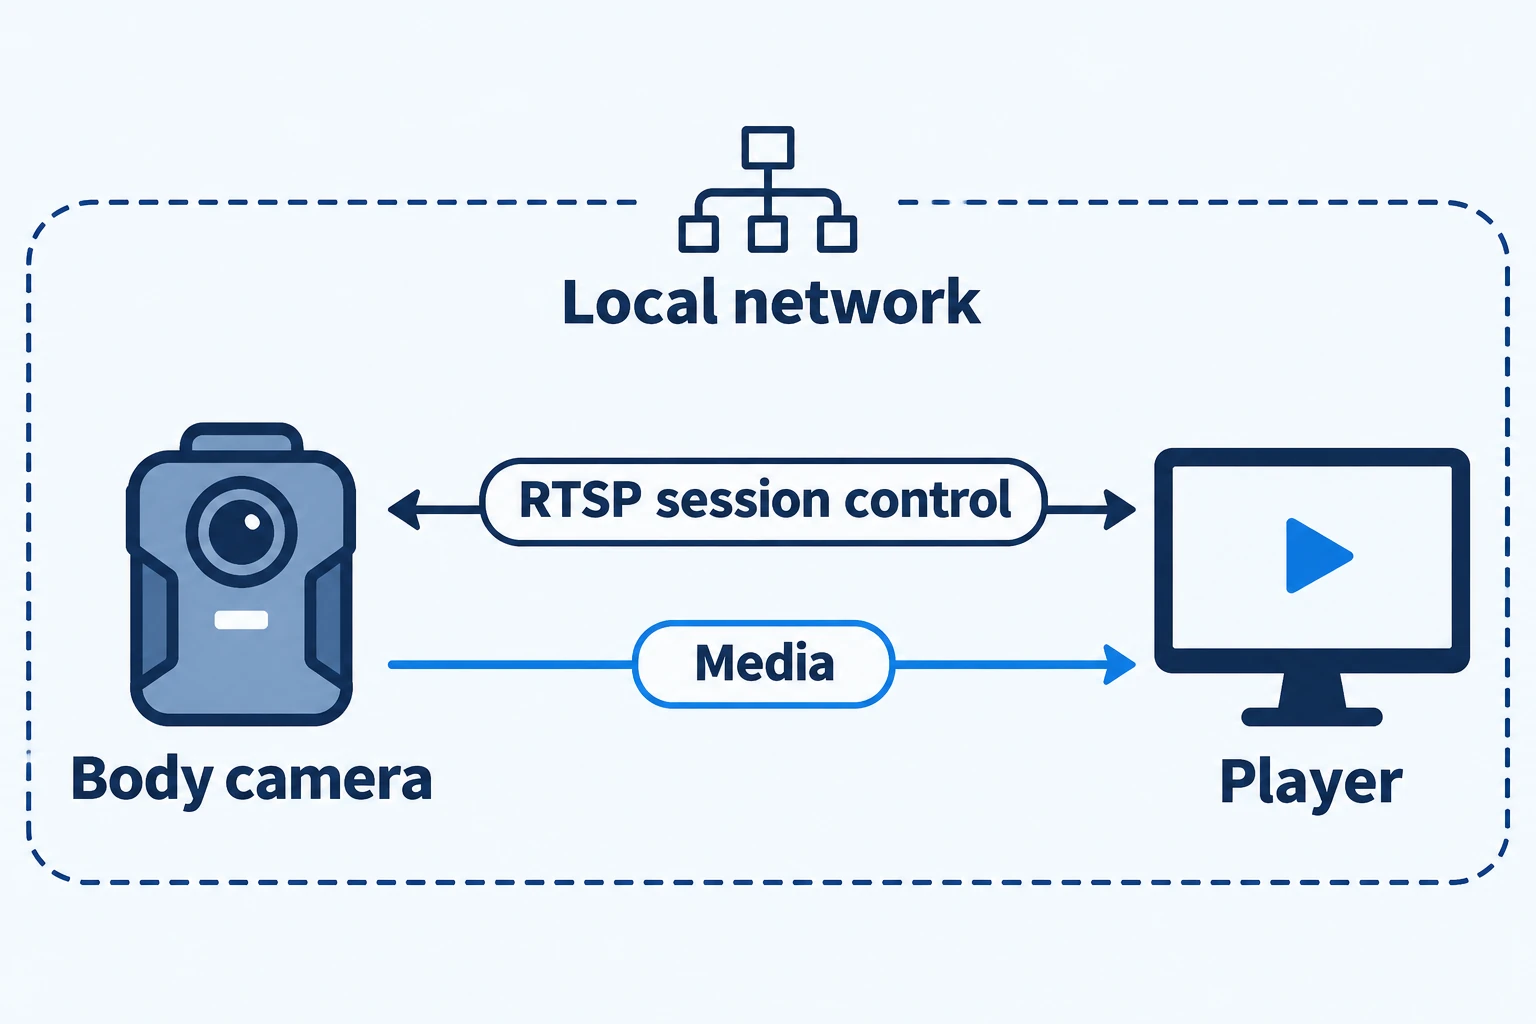
RTSP helps a client establish and control a media session. RTP commonly carries the video or audio associated with that session. They work together, but do different jobs: an RTSP connection can succeed while the media still fails to reach or play on the client. The IETF describes these roles in its RTSP specification and RTP specification.
In this tutorial, VLC connects to the service exposed by the camera. That is a common camera workflow, although RTSP also supports other publishing arrangements. The protocol name alone does not tell you which arrangement a device implements. Likewise, a standards document does not prove that a particular camera supports every method or RTSP version described in it.
Use a local playback test to establish a starting point
For an integrator evaluating a wearable video source, local playback separates several questions. First establish whether the camera, its network connection, and a known player work together. Then add the intended recording or viewing platform.
This approach can help with a bench evaluation, a support session, or a controlled on-site viewing trial. It also makes failures easier to describe: “VLC works on the camera’s network, but the recorder cannot connect” is more actionable than “streaming does not work.”
A successful VLC session establishes a limited baseline. It does not establish unattended recording, evidence handling, simultaneous viewer capacity, or access permissions for a team. Those belong in the next stage of acceptance testing.
Verify the Camera, Firmware, and Network Before You Start
Identify the S7P configuration shown in the tutorial
The video shows Cam Manager 5.0 and a camera whose Device Info screen identifies it as S7P. The visible firmware string is:
N4WBP.TTX_261022_V3.10.001_LCD5
Keep that version with your test notes. SPIKECAM’s S7+ product page is the configuration reference for the corresponding product family, but similar product names do not make every firmware build interchangeable. Request the instructions for the unit you actually have.
The useful starting facts here are concrete: this configuration exposes an RTSP option, provides Wi-Fi Station settings, displays an RTSP URL, and is shown playing in VLC. Those are reasons to evaluate it for a local RTSP workflow. They are not proof of every third-party integration.
Prepare a reachable local network and the correct access credentials
Before starting, have:
- The camera, sufficient charge, and a compatible USB data connection.
- The appropriate Cam Manager package and authorized device-management credentials.
- VLC on the viewing computer.
- An authorized Wi-Fi network that the camera can join.
- A permitted network path between the computer and camera.
The computer may use Ethernet while the camera uses Wi-Fi, provided the network permits communication between them. Connecting to an identically named SSID does not guarantee that devices can reach one another; guest isolation, separate VLANs, or firewall rules may intervene.
Treat Cam Manager login and RTSP authentication as separate checks. Use the credentials supplied or configured for your own device. The login demonstrated in a tutorial should not become a fleet-wide credential policy.
Select RTSP and Configure Wi-Fi in Cam Manager
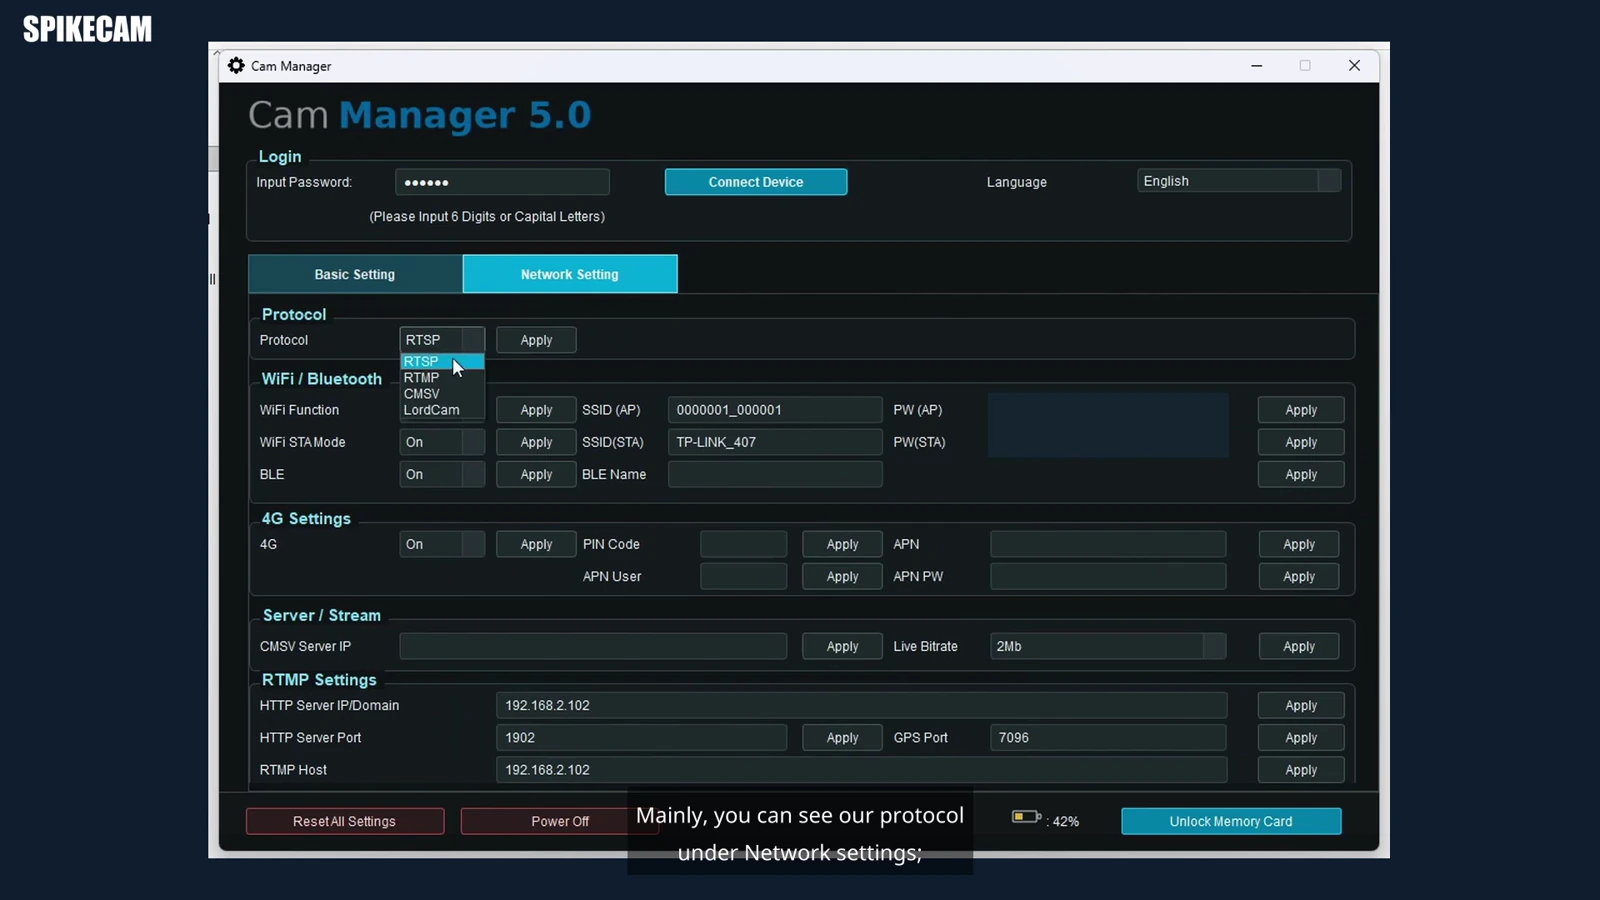
Select RTSP under Network Setting and apply the change
The configuration sequence begins around 00:23 in the video. Connect the camera to the computer, open Cam Manager, and connect to the device using your authorized login.
Open Network Setting, locate Protocol, select RTSP, and click its Apply button. Check the selected value before moving on. If your software has different controls or no RTSP option, obtain the matching instructions rather than assuming an unrelated firmware package will add it.
The same window includes settings for other workflows. The RTMP Host, HTTP service port, and GPS port are not the RTSP URL you will enter in VLC. Changing those fields is not part of the demonstrated RTSP setup.
Enable Wi-Fi Station mode, save the network, and restart
For the demonstrated Wi-Fi connection:
- Set WiFi Function to On and apply it.
- Set WiFi STA Mode to On and apply it.
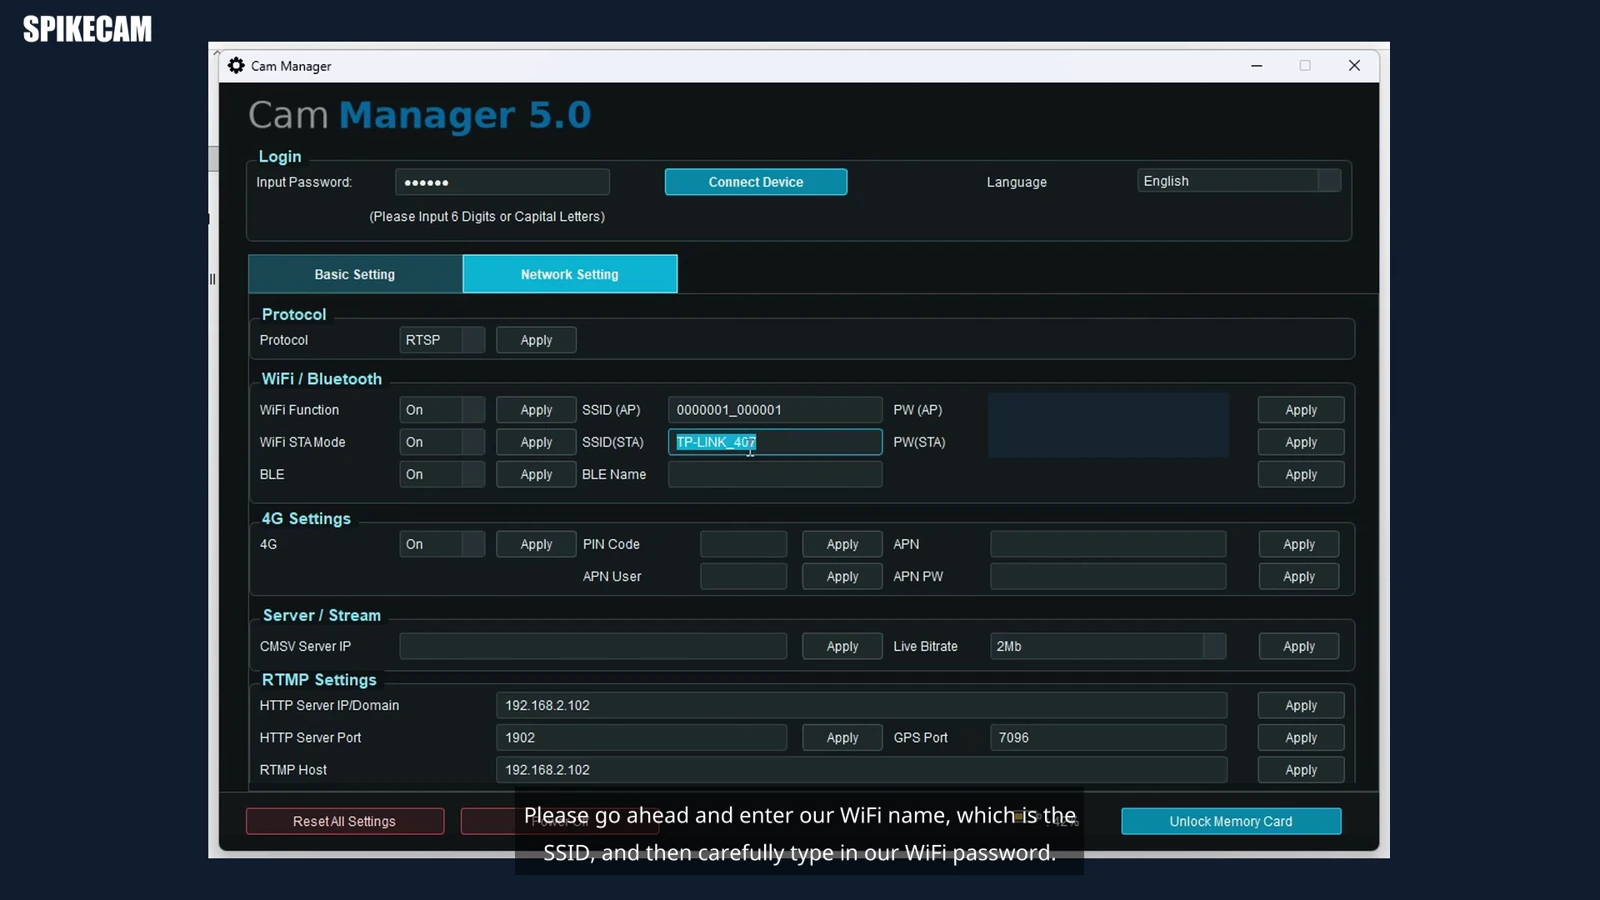
- Enter your network name in SSID(STA) and its password in the corresponding PW(STA) field.
- Apply the settings, then follow the demonstrated disconnect-and-restart sequence.
- After startup, check that the camera has joined the intended Wi-Fi network.
Station mode makes the camera a client of the Wi-Fi network. The separate AP fields describe a different role and should not be confused with the router credentials used here.
The screenshot also contains BLE and 4G controls. Their appearance does not make either one a prerequisite for this local Wi-Fi demonstration. Keep the first test focused on the connection you are trying to validate, and record any differences between your configuration and the tutorial.
Find the RTSP URL on the Camera
Read the Wi-Fi address and RTSP URL in Device Info
Around 01:28, the tutorial moves to the camera’s menu. Navigate to the About/Device Info information shown for this firmware. The clear screen image at approximately 02:16 displays the Wi-Fi address and the complete RTSP URL.
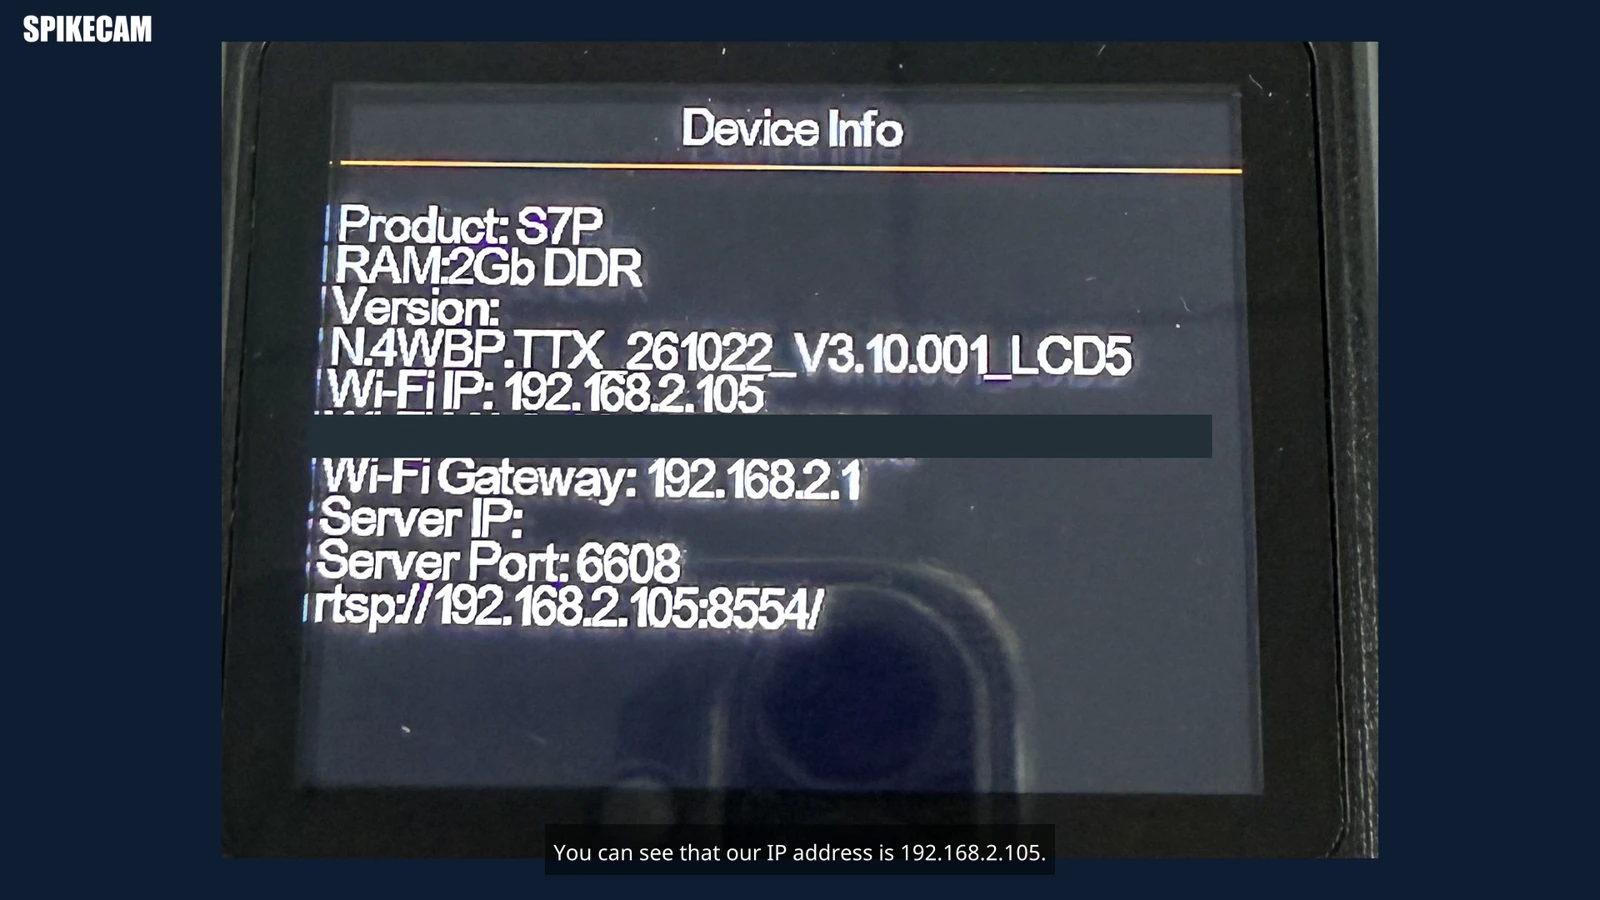
The device screen shows:
rtsp://192.168.2.105:8554/
The VLC entry later appears without the final slash. Both observations belong to this demonstration; copy the complete address supplied by your own device or its documentation.
Use the displayed port and path instead of guessing
Read the example in three parts:
| Part | Meaning in this demonstration |
|---|---|
rtsp:// | The requested streaming protocol |
192.168.2.105 | This camera’s local Wi-Fi IP address |
:8554/ | The displayed RTSP port and root path |
Neither the IP address nor port 8554 is a universal body-camera setting. Do not substitute another manufacturer’s /stream1 path or assume the commonly used port 554 applies here. The separate Server Port 6608 visible on the device screen is not the RTSP port in the displayed URL.
Recheck the address after changing networks or restarting: DHCP assignments can change. Also verify whether your configuration requires RTSP credentials. A URL shown without a username and password does not establish the device’s authentication policy.
Open the Stream in VLC and Verify Playback
Open Media, then Open Network Stream
The VLC sequence starts around 02:19. In the Windows interface shown, choose Media → Open Network Stream, enter the camera’s URL, and select Play. If your configuration requests authentication, use its authorized RTSP credentials.
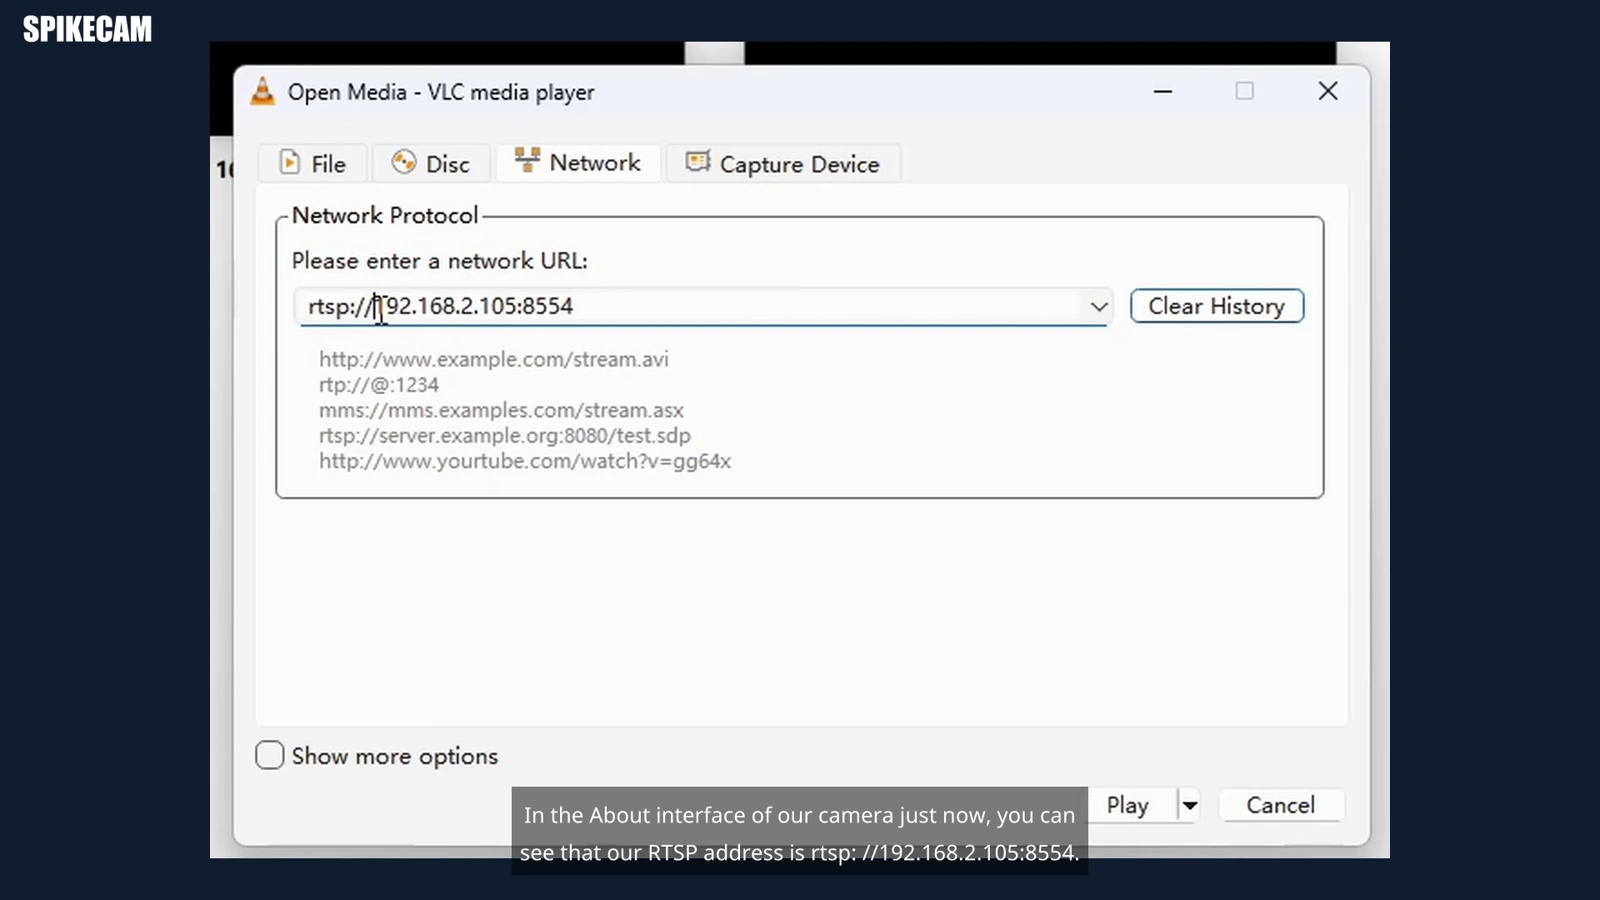
The tutorial’s address entry is rtsp://192.168.2.105:8554. Replace it with your own address; copying the example will not find a camera on another network.
If playback fails, keep the exact error message and time. Avoid changing the camera, router, and player settings together, because you will lose the ability to identify which change mattered.
Check moving video, sound, and the actual stream information
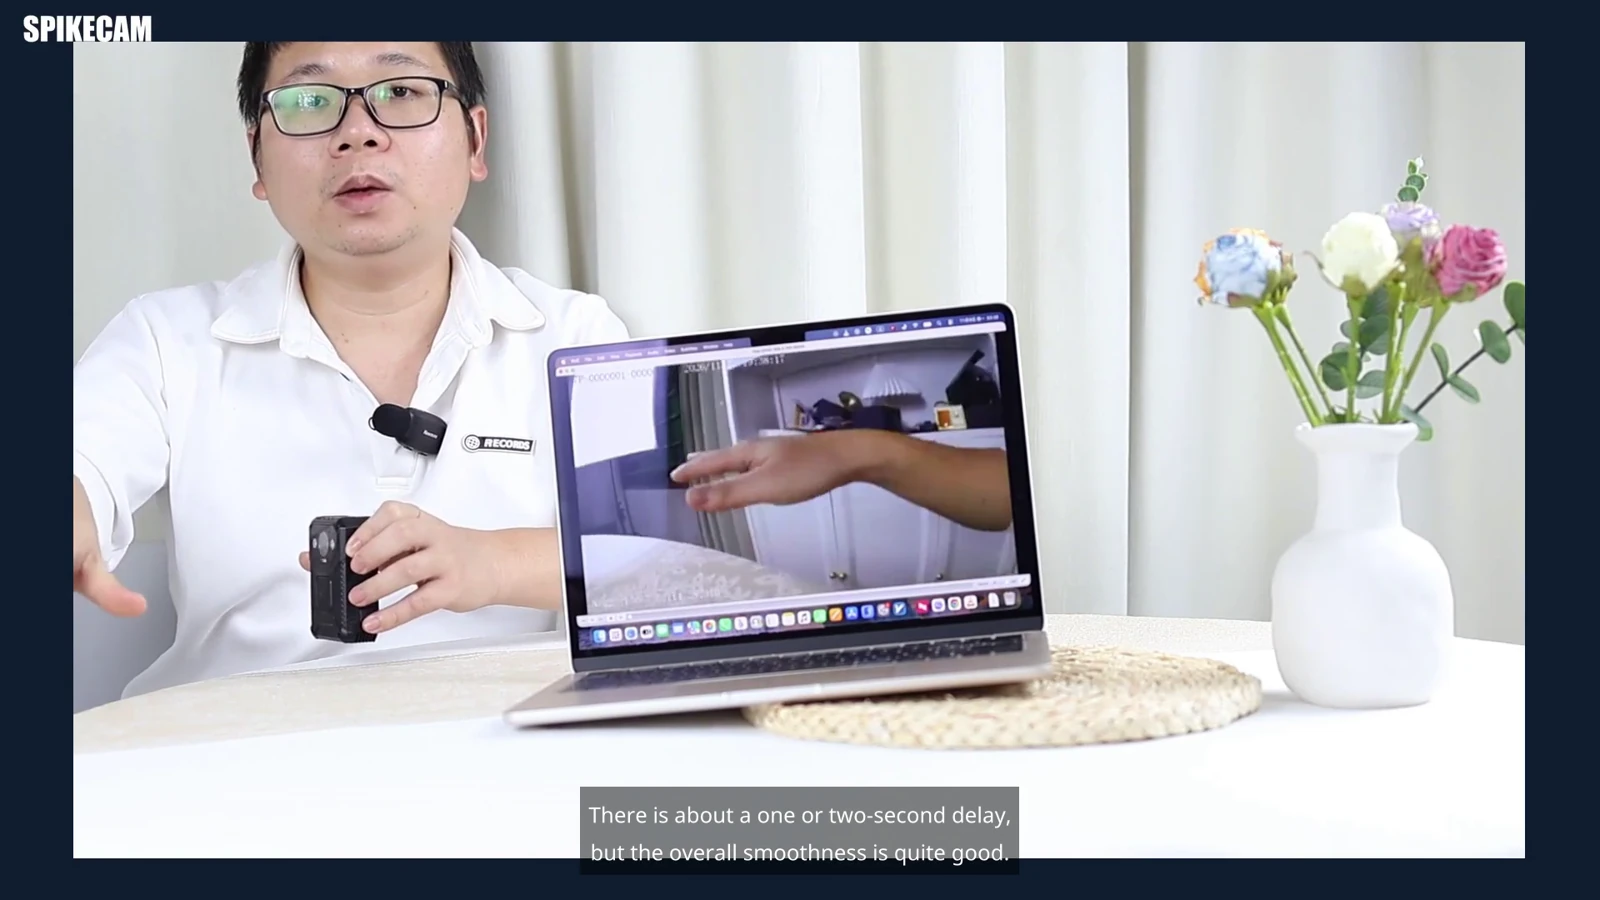
Use a recognizable movement in front of the camera to check that the image is updating. Check audio separately: make a brief spoken test, confirm the expected microphone is enabled, and check the player’s output and volume. The video includes an audio-check demonstration, not a measurement of microphone quality or two-way communication.
For your own test, open Tools → Codec Information in VLC and record the reported video and audio details. Milestone’s official VLC troubleshooting guidance recommends checking codecs and matching the streaming mode when comparing VLC with its management client. That advice does not certify SPIKECAM compatibility with that platform.
The uploaded tutorial’s resolution and encoding describe the edited video file, not necessarily the camera’s live stream. Peter’s comment about roughly one or two seconds of delay is an informal observation in this setup. If latency affects your task, define and measure an acceptable result under your intended conditions.
Troubleshoot a Body Camera RTSP Stream in Layers
Resolve address, reachability, and authentication errors first
Start with the camera’s current status and address. A saved Wi-Fi configuration does not prove that the camera has connected. A computer with internet access does not prove it can reach the camera.
Use the following sequence, keeping one working configuration as your reference. Error wording varies by client; the checks are diagnostic suggestions, not confirmed faults in the S7P.
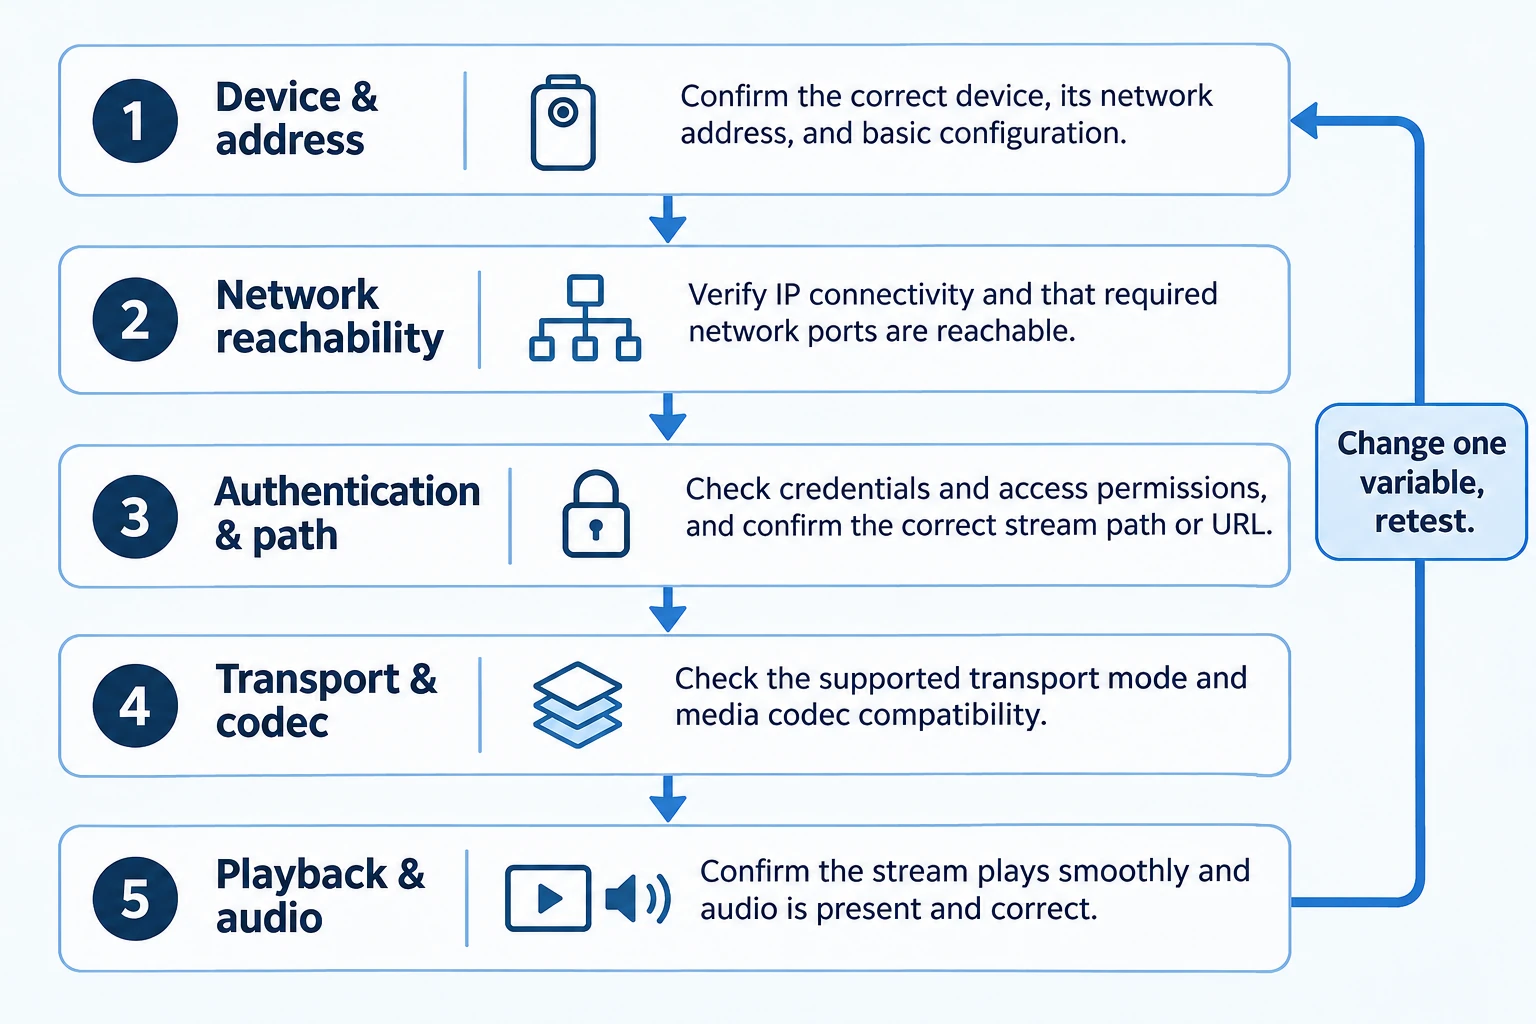
| Symptom | First check | Next step and evidence to retain |
|---|---|---|
| Connection times out | Camera Wi-Fi state and current IP | Check routing and guest/client isolation with the network administrator; record the network path. |
| Connection is refused | Displayed URL, port, and whether RTSP was applied | Confirm the service/configuration with model support; keep the exact error. |
| Authentication fails | The device’s RTSP access requirements | Verify the permitted account and authentication method; do not assume the Cam Manager login is interchangeable. |
| Connection opens but no picture appears | Exact stream path and client transport | Compare a supported transport option and inspect stream/decoder information. |
| Picture works but sound does not | Microphone state, available audio track, player output | Record whether an audio track exists before assuming a network problem. |
| Playback freezes or arrives late | Coverage, packet loss, stream settings, and player buffering | Change one variable, repeat the same observation, and record the outcome. |
Isolate transport, codec, audio, and buffering problems
If both client and camera support it, testing RTP over the RTSP TCP connection can help distinguish a UDP media-path problem from another failure. TCP interleaving describes carrying media within that connection; it is not a third transport option alongside TCP and UDP. The mechanism is described in RTSP 1.0, while MediaMTX’s RTSP documentation provides client-side transport examples.
A transport change is a diagnostic trial, not a guaranteed fix or latency improvement. If it works, record that setting for the target client. If it fails, retain the result and continue with the next layer.
Avoid making the camera publicly reachable or disabling broad firewall protection just to get a picture. Ask for a narrowly permitted network path. Share sanitized logs, version information, and settings with SPIKECAM support; leave passwords out of screenshots and tickets.
Plan NVR, VMS, Browser, and Remote Access Separately
Check RTSP compatibility without assuming ONVIF conformance
A recorder that accepts manually configured RTSP sources may be a candidate for the next test. Confirm its exact version, URL format, authentication support, transport options, codecs, and recording behavior. Reproduce the successful VLC settings where appropriate, then verify the recorder’s actual output.
ONVIF is a separate question. Its official conformant-product database ties conformance to specific products and firmware/software versions. An RTSP URL does not establish an ONVIF profile, automatic discovery, events, or device-control support. This tutorial has not established S7P ONVIF conformance.
Choose a reachable remote path and a browser delivery format
RTSP is not restricted to local networks. However, the receiving client needs a permitted route to the service it is accessing. A 4G camera with outbound internet access may still be unreachable from an external server; carrier NAT and private addressing can affect that path. RFC 6598 explains the shared address space used for carrier-grade NAT.
| Viewing goal | What to validate beyond this video |
|---|---|
| Local VLC playback | Your camera, URL, credentials, permitted network path, and media playback |
| NVR/VMS recording | The target product’s ingest support, recording, playback, and reconnection behavior |
| Browser viewing | A suitable gateway, browser delivery format, compatible codecs, and viewer access controls |
| Remote or 4G viewing | A supported, reachable architecture and permissions across the actual networks |
A supported private-network connection, gateway, relay, or outbound publishing route may address a remote-access requirement. Do not assume this camera can run VPN software or publish RTSP outward merely because it offers an RTSP menu.
For browser viewing, a media gateway can receive RTSP and provide a suitable format such as WebRTC or HLS. MediaMTX illustrates that architecture, but browser codec support still needs checking. The video does not demonstrate that integration. GPS, SOS, talkback, and remote camera control also need their own supported interfaces.
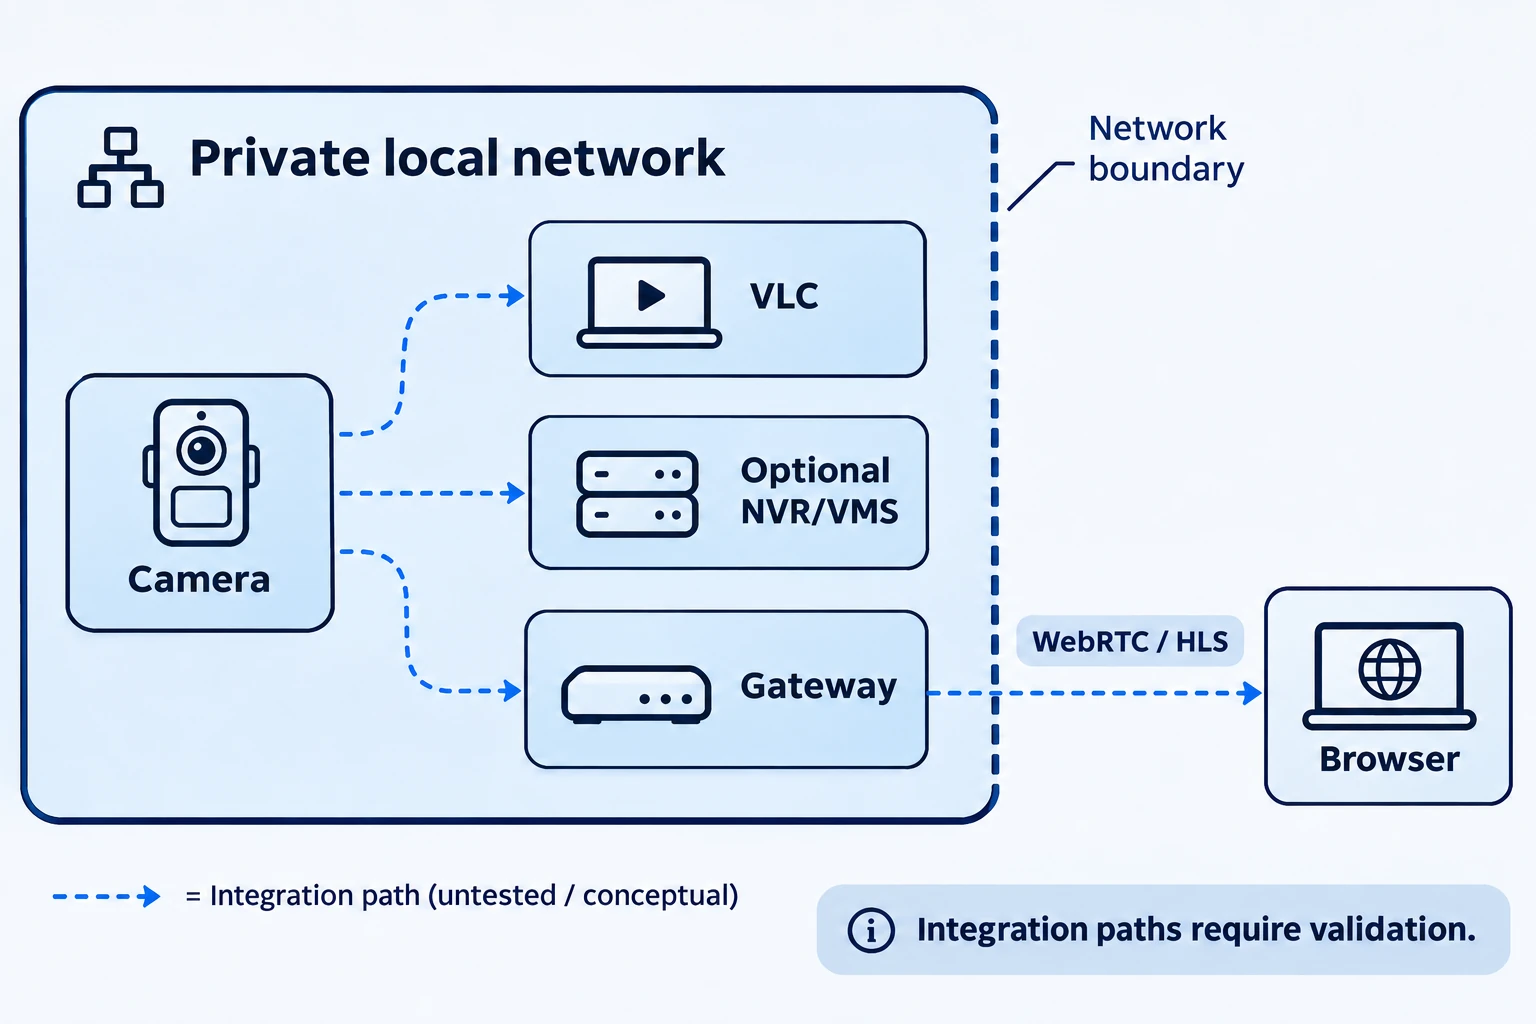
For platform choices and implementation planning, continue with our streaming protocols and open-source platforms guide.
Use an RTSP Pilot Checklist Before a Team Deployment
Record the results for your exact camera and client
Illustrative scenario—not a customer case: an integrator wants a wearable camera feed in an existing VMS. The proposed first exercise is one S7P and one VLC computer on a permitted local network. Once that baseline is recorded, the integrator tests the VMS separately. No outcome is assumed for either step.
Copy this checklist and leave results blank until observed:
| Record | Result to enter during your pilot |
|---|---|
| Device and software | Model, hardware revision if known, firmware, Cam Manager and player versions |
| Network and stream | Network type, current URL, permitted route, authentication requirements; exclude passwords |
| Media | Reported codecs, resolution, video movement, audio-track presence and sound check |
| Continuity | Restart/reconnection results, observation duration, and any interruptions |
| Workload | Required viewers, target recorder, and results for simultaneous tasks such as recording plus streaming |
| Acceptance | Agreed task-specific limits, actual observations, unresolved items, reviewer and date |
Ask SPIKECAM to confirm the configuration you need
The S7P demonstration gives buyers a concrete starting point for an RTSP evaluation. Its visible configuration controls and local playback can help a technician establish a reproducible baseline before investing in platform integration.
For your project, discuss the required configuration with SPIKECAM. Include the camera model and firmware, destination network, target platform and version, expected viewers, and required audio or recording functions. Request confirmation of the applicable RTSP address format, access controls, and supported integration route.
Keep the completed test record with the sample evaluation. Our live-streaming deployment checklist covers the broader team workflow once that technical baseline is established.
Related articles
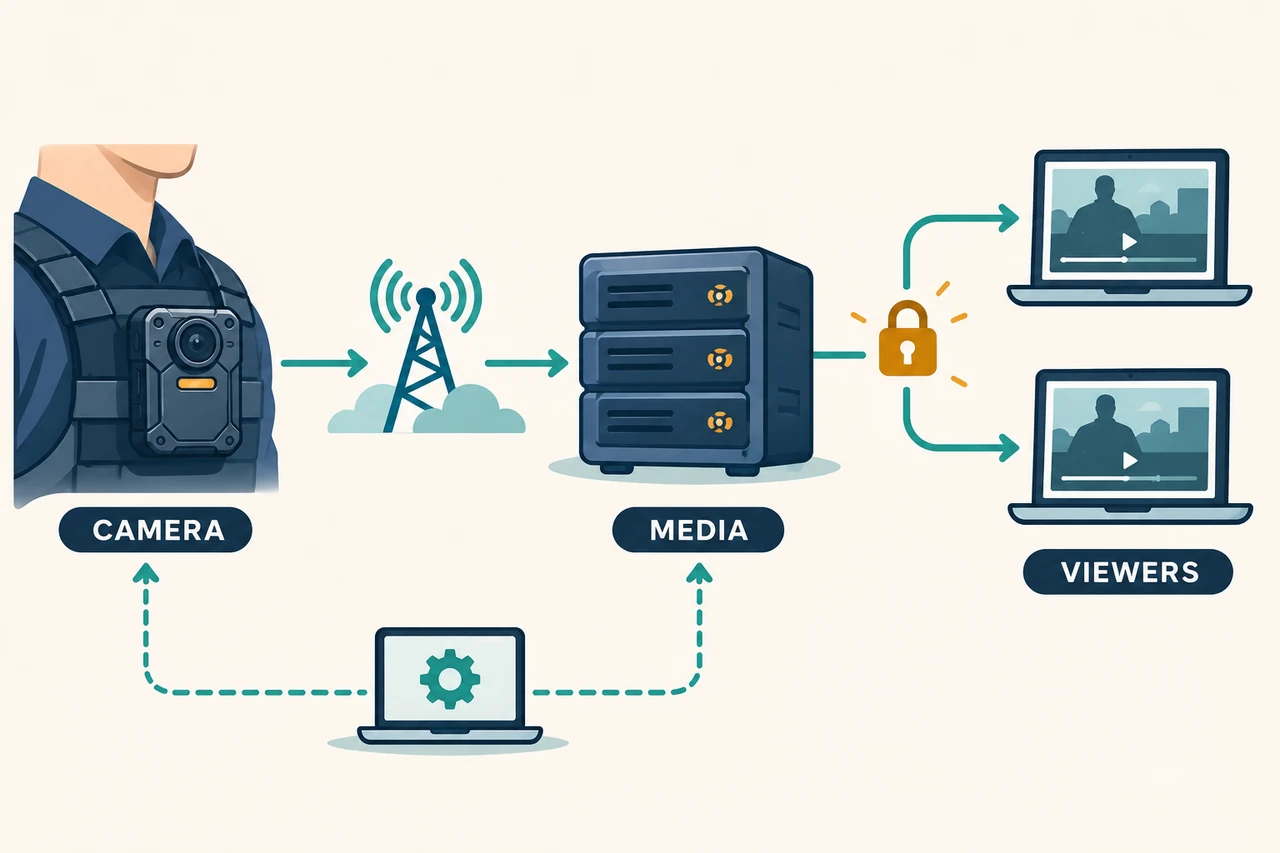
Body Camera Streaming Protocols: RTMP, RTSP, CMSV, and 10 Open-Source Platform Options
Understand body camera streaming protocols, compare 10 self-hosted platform routes, and use practical AI coding prompts to plan a private live video pilot.

Body-Worn Cameras with Live Streaming: A Team Deployment Checklist
Plan a live-streaming body camera pilot: check connectivity, the receiving workflow, video quality, data use, battery demand, and recovery before ordering.

Body Camera Buying Guide: How to Choose the Right One
Choose a camera around recording controls, battery life, file access and your actual working routine.